The old Boston & Maine Railroad’s Fitchburg route hugs the Millers River east of Millers Falls as it ascends toward Erving and Athol.
Last week, Paul Goewey and I followed Pan Am’s slow moving eastward unit grain train destined for Ayer, Massachusetts. This had been delayed by telemetry communication problems with its tail end.
A radio telemetry unit is used in place of a caboose on most North American freight trains. This communicates air pressure information relating to the air brake system, and can allow the engineer to set train brakes from the rear end in event of an emergency.
Four former CSX GE-built DASH8-40Cs were leading the train.
We set up near Farley’s, located at a grade crossing a few miles timetable west of Erving, where I made these photos of the train working the grade.
Back-lighted conditions accentuated the drama of the ascent by illuminating the locomotive exhaust.
Telephoto view: Exposed using a FujiFilm X-T1 with 18-135mm zoom lens.Wide-angle perspective from the same vantage point. Exposed using a FujiFilm X-T1 with 18-135mm zoom lens.Sneaky tip: we removed a few wayward branches from the foreground of the scene prior to arrival of the train to minimize unwanted visual distractions in the composition of our photos.
I wanted to write, ‘why sometimes winter is better.’ Except this is a late autumn photo. (If you accept that the Winter Solstice is the defining date for the beginning of Winter.).
On December 6, 2017, Paul Goewey and I arrived at Depot Road in Leverett, Massachusetts several minutes ahead of the southward New England Central road freight, job 611 from Brattleboro.
I was interested in exploring this angle looking toward the rock cut immediately north of the old station location.
I’ve made a number of views from the old station area in summer, when the cutting tends to be obscured by brush and harshly shadowed.
And that’s why sometimes Winter (or late autumn) is better. The lack of foliage combined with diffused light opens up numerous photo possibilities that are impractical when the trees are leafed out and underbrush is thick.
Exposed using a FujiFilm X-T1 with an 18-135mm lens.Exposed using a FujiFilm X-T1 with 18-135mm lens.
The other night I made this digital photograph of Boston’s South Station.
Working with my FujiFilm X-T1 with 12mm Touit, I set the ISO to 1600 and handheld the camera at ¼ sec.
I calculated exposure manually using the camera meter, and then intentionally increased the exposure by about ½ stop. (In otherwords I let in more light to the sensor than recommended by the meter).
In post processing, I adjusted contrast and exposure to control highlights and lighten the night sky in order to overcome two of the common failings of night photographs: blasted highlights and excessive inky blackness.
Boston’s South Station facing Atlantic Avenue.Here’s a screen shot of my reduced Jpg with the EXIF data. This shows how the camera was set. Notice ISO, f-stop, shutter speed, and white balance fields.
Autumn sunrise. No two are the same. The mix of clouds and particulates in the air make for endless mixtures of texture and color.
Last week I arrived in Worcester to take the 7am MBTA train to Boston.
I made these sunrise views using my FujiFilm X-T1 with 12mm Zeiss Touit lens handheld.
Worcester Union Station: MBTA 011 with the 7am train to Boston.Worcester Union Station.December sunrise in Worcester, Massachusetts.
Working with the RAW files, I made some minor adjustments in Lightroom to balance highlights with shadows and tweak color balance.
The RAW file is not what your eye sees.
Where the in-camera Jpg uses a pre-profiled set of parameters in regards to color saturation, contrast etc. The digital RAW file represents the data as captured by the camera and is comparable to a film negative; it represents an intermediate step that requires adjustment and interpretation to produce a pleasing photograph.
I typically expose both a pre-set in-camera Jpg (often with one of Fuji’s digitally replicated film color profiles, such as Velvia) and a RAW file simultaneously.
In November 2017, I returned to this location in advance of the approaching northward Housatonic freight NX-12 that featured two early 1960s-era GP35s in the lead followed by 32 cars (28 loads, 4 empties) and another GP35 at the back.
I find the railroad setting here fascinating. The combination of the traditional line with wooden ties and jointed rail in a setting of old factories, freight house and passenger station makes for a rustic scene out of another era.
Working with a Nikon F3 with 50mm lens I made a series of black & white photos on Kodak Tri-X. And, I also exposed a sequence of digital color photos using my FujiFilm X-T1.
Freight house at Housatonic, Massachusetts. Exposed on Tri-X with a Nikon F3 fitted with a 50mm Nikkor lens. Film processed in Kodak D76 1-1 with water for 7 minutes 20 seconds at 68F.Freight house and factories, looking north from the westside of the tracks. In today’s railroad world, this scene is decidedly rustic. Digital color photo exposed with a FujiFilm X-T1. RAW File processed in Lightroom with contrast adjustment to improve shadows and highlights.Tri-X black & white photo of Housatonic Railroad freight NX-12 working northward.Digital color photo exposed with a FujiFilm X-T1. RAW File processed in Lightroom with contrast adjustment to lighten shadows and control highlights.Tri-X photo with 50mm lens.Digital color photo exposed with a FujiFilm X-T1. Fuji Velvia color profile; camera Jpg scaled for Internet.Digital color photo exposed with a FujiFilm X-T1. Fuji Velvia color profile; camera Jpg scaled for Internet.
I’d spent November 24, 1984 with some friends exploring railroads in the Albany area.
Delaware & Hudson had recently been included in the Guilford network and its operations were being melded with Boston & Maine. At the time, D&H still had a lot of old Alco diesels.
We had stopped by Mechanicville earlier in the day, and I made a selection of photos (that I’ll post at a later date) then we drove via Schenectady to Rotterdam Junction to photograph Conrail.
On the way back east, we made another visit to Mechanicville, when I exposed this twilight view. This is an evocative image that represents a symbolic twilight as well as a literal one.
Exposed with a Leica 3A on Kodak Tri-X, processed in Kodak D76 1-1.
It was twilight for the D&H Alcos; twilight for the old Mechanicville Yard; and twilight of the brief colorful and busy era on Guilford before a series of strikes changed everything.
I have thousands of properly exposed Kodachrome slides from the 1980s and 1990s. This view of Amtrak 502 was exposed at Oakland, California 16th Street Station in August 1992.
Gradually I’ve been scanning these into my archive. I’ve experimented with several different scanners and software, using various settings and techniques.
So far, I found that I get sharpest and most colorful scans by using a Nikon Super Coolscan 5000 driven with VueScan 9×64 (version 9.5.91) software.
VueScan offers me a high degree of control, but I’ve found requires a bit of practice and experimentation to obtain the best scans.
I typically scan Kodachrome 25 slides at 4000 dpi (dots per inch) and then output as a Tif file to obtain the greatest amount of data. For this slide I opted to make a multiple pass scan to retain a higher degree of shadow detail. (VueScan offers the multiple pass option under its ‘Input’ pull down menu).
To make the most of the scan for internet presentation, I imported the Tif file into Lightroom and lightened the shadows and balanced the highlights, before outputting as a scaled Jpg. (The original scan remains unchanged during this process).
Kodachrome slides recorded tremendous amounts of information and the original Coolscan Tif is far too large to present here.
Incidentally, a version of this photo appears on page 148 of my book Modern Diesel Power (published by Voyageur Press in 2011). The scan in the book was made by my publisher and isn’t the scan presented here.
The old Western Pacific Junction at Keddie, California between WP’s east-west transcon line from Oakland to Salt Lake City and the Inside Gateway/High Line route north to Bieber was once one of the most photographed bridges in California.
What’s not evident from most photographs is that this impressive looking bridge can be viewed from California Highway 70—the main road through the Feather River Canyon.
The famous Keddie Wye.
On a dull October 2003 afternoon I made this view of the famed ‘Keddie Wye’ (as the junction is popularly known).
Contrast and texture make this photo work. My color slides from that day of the train crossing the bridge are less impressive.
Exposed on Kodak 120-size Tri-X using a Rolleiflex Model T with a Zeiss Tessar; processed in Ilfotec HC, and scanned using an Epson V750. Final contrast adjustments were made in Lightroom to emphasize highlights and lighten shadows.
Tracking the Light Publishes Something New Everyday!
A little more than a month after the events of 911, the historic Canaan, Connecticut Union Station was destroyed by fire.
Thankfully the classic structure has since been reconstructed and today it stands along the Housatonic Railroad line where the old Central New England route once crossed.
Exposed with a FujiFilm X-T1 digital camera fitted with a 18-135mm Fujinon zoom lens set at 98mm.Exposed with a FujiFilm X-T1 digital camera fitted with a 90mm Fujinon prime lens.Exposed with a FujiFilm X-T1 digital camera fitted with a 90mm Fujinon prime lens.
I made these photos last week on a visit to Canaan. Sometimes it helps to be in position at a sunrise and watch how the light changes as the sun climbs into the sky.
I featured the old Canaan Union Station in my book Railroad Stations published by MetroBooks in 1998.
In March 1984, I borrowed my father’s Rolleiflex Model T and exposed a roll of 120-size Ektachrome of Boston & Maine freights in the Connecticut River Valley.
The Rollei was an old camera and there was nothing electronic on it. Setting the camera was entirely up to the photographer. I was still in high school and my skills at using a hand-held light meter were less than perfect.
In short, the combined effect of snow on the ground and my lack of experience left me with some seriously underexposed medium format transparencies.
Scanning lightened the photos significantly, yet the results still demonstrate my failure to expose properly. To make for a more pleasing images I needed to adjust exposure and contrast in post processing. However it was important to scan the transparencies in such a way as to capture as much information as possible.
I was disappointed with my results and left the uncut film in the box that it was returned to me from the lab. I left them there for 33 years and only re-discovered them a few weeks ago. (Try that with your digital photos. No actually, don’t try that!).
With the technology now at hand I decided to see what I could do to make these photos presentable despite serious underexposure (suffering from receiving insufficient light).
Working with an Epson V750 flatbed scanner, I scanned the transparencies (positive color film) using VueScan 9×64 (version 9.5.91) software.
Scanning, like photography, is an art and I’ve found to make the most effective scans often requires a bit of knowledge and skill.
I’ve worked with both the Epson and VueScan software, and while both produce excellent results, for this effort I chose VueScan because it allowed me greater control of the scanning process.
To extract more information from these difficult photos, I opted to make multi-pass scans, which do a better job of capturing detail in high-lights and shadows. The software combines the data in the final file.
This is a screen shot of the VueScan work window. Notice the histogram at the left. This shows the distribution of data in the image relative to highlights, middle areas and shadows. The graph thus indicates that too much of the data is toward the shadow end, thus the unfortunate effect of gross underexposure.This is the input control window. Notice that I’ve selected to make a multiples scan with three samples. This gathers greater amounts of information from the image than a single pass scan. While not necessarily immediately evident to the naked eye, this provides a base with which to adjust the photograph in post processing. In other words I’ll lighten the image after scanning, but want to retain as much detail as possible.
Once scanned, I then imported the Tif files into Lightroom for post processing adjustments. The photos presented here are scaled from the original tif files (which are far too large for internet presentation).
Here’s the lightened scan after scaling for internet presentation. Keep in mind that original transparencies are nearly opaque.
The results are not perfect, but vastly superior to the muddy, dense original chromes.
To allow you to better understand how I’ve set up the scanner with the VueScan software, I’ve included screen shots (above) of the various sub-menus which show the various options and parameters I used.
There is more than one way to make a scan, and I’m sure if I continue to play with these chromes I may get an even better result. However, I have thousands of photographs that need scanning, and I’m limited to 24 hours a day.
On October 30, 2003, I spent a day photographing BNSF and Union Pacific trains on the old Western Pacific route through California’s Feather River Canyon.
This exceptionally scenic route has long been a popular place to picture trains.
Although photogenic, one of the conceptual problems with the canyon making the balance between train and scenery work.
Too much train, and the canyon becomes a sideshow. Too much canyon and the train is lost in the scenery.
One way to make balanced is through the clever use of lighting.
That’s what I’ve done here.
Exposed on Kodak 120-size Tri-X using a Rolleiflex Model T with a Zeiss Tessar; processed in Ilfotec HC, and scanned using an Epson V750. Final contrast adjustments were made in Lightroom to emphasize highlights and lighten shadows.
I’ve pictured an eastward BNSF climbing through Rich Bar, and by back lighting the train, I’ve helped emphasize it’s form that might otherwise be lost in the darker reaches of the canyon.
Over the years I made countless photos of Amtrak’s block-like E60 electrics working underwire.
So for me it’s a bit strange to see one of these 1970s-era machines on static display outside of the Railroad Museum of Pennsylvania alongside a PRR DD1 electric and some other classics, including a 1980s-era AEM-7 (topic of a future Tracking the Light Post).
Exposed using a Lumix LX7 in November 2017.
Since today Amtrak 603 represents the E60 fleet, I scanned through my archives to locate photo of 603 at work on the Northeast Corridor. It’s pictured with a long distance train on August 1, 1986 at Linden, New Jersey.
I made this view on Kodachrome using a Leica 3A fitted with a 200mm Leitz Tellyt using Visoflex reflex attachment.
I couldn’t have anticipated then that engine 603 would someday be a museum piece!
Two weeks ago I caught Amtrak engine 184 in the Northeast Direct heritage scheme working train number 56 (northward Vermonter).
The light was fading, so I upped the ISO on my FujiFilm X-T1 to 1000 and exposed these views using my 27mm pancake lens.
Although I set the shutter to 1/320 of a second, the relatively fast train still necessitated panning to keep the locomotive sharp. Panning had the effect of setting off the background in a sea of blur and conveying a sense of motion to the photos.
The Northeast Direct livery was briefly applied to locomotives in the mid-1990s. Engine 184 was repainted in this livery in 2011 to commemorate Amrak’s 40th Anniversary.
White balance was set at ‘daylight’ in order to better retain the blue glow of dusk.
On my visit to Carneys Point, New Jersey earlier this month, I exposed a few select frames of Kodak Tri-X using my Canon EOS-3 with 40mm pancake lens.
Previously, I posted a selection of the digital color photos that featured Conrail Shared Assets freight CA11. See: Bright Day on the Pennsylvania-Reading Seashore Lines. https://wp.me/p2BVuC-59B
I processed the film yesterday (Monday, 27 November 2017) using my two-stage development recipe:
By starting with ‘presoak’ solution that features a very weak developer, I allow for increased development in the shadow areas. My primary developer for this roll was Kodak D-76 stock solution diluted 1-1 with water.
While I intentionally under processed the film to avoid excessive highlight density, following stop bath, fixing baths, and rinse, I then soaked the negatives in selenium toner (mixed 1 to 9 )for 8 minutes to boost highlights to my desired ideal.
The results are these broad-toned monochromatic images with delicate silvery highlights.
A side effect of this process is the exceptionally archival quality of selenium toned original negatives that without any expensive storage conditions should long outlive my digital photos.
Conrail Shared Assets CA11 works at Carney Point, New Jersey.The old Bell Telephone logo is a blast from the past.My special ‘presoak’ developer aids in greater shadow detail.
Since Genesee & Wyoming took over Rail America, gradually the fleets of diesels operated by the component railways have been repainted into G&W’s corporate livery of orange and black with yellow highlights.
This traditional paint scheme had been used by the original G&W short line railroad for decades.
Here I’ve put the brightly colored diesels in scene that makes the most of the scheme.
New England Central 611 is southbound at Northfield, Massachusetts with locomotive 3475 in the lead. A cloud has briefly diffused the morning sun.
To make the most of the lighting and the scene, I made this telephoto view looking down a road, visually placing the orange and black locomotive in front of a yellow house.
The dominance of orange and yellow for the primary subjects works well in the late autumnal scene, as these colors mimic the muted foliage and grasses associated with the season.
Last week I exposed this view of New England Central 611 (Brattleboro to Palmer) crossing the Connecticut River at East Northfield, Massachusetts.
New England Central 611 crosses the Connecticut River at East Northfields, Massachusetts. Exposed with a Fuji Film XT1.
To compensate for the back lit high-contrast scene, I made a few necessary adjustments in post processing.
Working with the Camera RAW file, I applied a digital graduated filter across the sky and locally lowered highlight density, while altering the contrast curve and boosting saturation.
I then made global adjustment to contrast and saturation across the entire image, while brightening the shadow areas. The intent was to better hold detail in the sky.
To make this possible, it was necessary to expose for the sky, and allow the train and bridge to become comparatively dark. I did this knowing I’d make adjustments after the exposure.
Last week (November 2017) I made these picturesque tableaus of the Strasburg Railroad in its classic Pennsylvanian Dutch settings.
All were made with my FujiFilm XT1 digital camera.
Over the years I’ve made more than a dozen visits to the Strasburg Railroad, but this most recent trip was the first time I’d exposed digital photos here. I guess it’s been a while since my last visit.
The real topic is about how to use a wide angle lens when faced with a backlit subject.
Last week, while photographing Conrail Shared Assets freight CA11, Pat Yough and I were faced with finding suitable locations for the northward run. Complicating our challenge was the clear blue sky, which resulted in harsh back lighting at most locations.
Our train had an unusual consist of four diesels, led by one of CSX’s new SD40E3 ‘Eco’ units, but also featured one of Norfolk Southern’d former Conrail SD80MACs (third unit out).
We scoped several locations and ultimately settled on a broadside view near Penns Grove, New Jersey where the railroad crosses Perkintown Road.
To make the most of this setting, I opted to use the large tree by the side of the road as compositional frame, and exposed a series of images with my FujiFilm XT1 fitted with a Zeiss 12mm Tuoit.
Conrail Shared Assets freight CA11 works northward at Perkinstown Road near Penns Grove, NJ.A variation of the previous image; one of more than a dozen digital images I exposed as the train worked across the road crossing.
This extremely sharp lens allows for exceptional clarity in backlit situations. In post processing I lightened shadows and nominally reduce the contrast to minimize unpleasant qualities associated with back lighting.
I made good use of the pass, traveling over several heavy rail routes to make photos.
One of the greatest features of this pass is the ability to get on and off trains without concern for cost, or trying to explain to the conductor where I’m are traveling to. This allows me to change my plan on the spot if I see an interesting location.
SEPTA offers regular interval service on most of its suburban lines, with extra trains in the evening rush hour.
Lumix LX7 Photo.FujiFilm XT1 photo at Berwyn, Pa.FujiFilm XT1 photo at Berwyn, Pa.Lumix LX7 photo on the Main Line at Merion, PA.Lumix LX7 photo at Glenside, PA.FujiFilm XT1 photo.FujiFilm XT1 photo at Glenside.Lumix LX7 photo.FujiFilm XT1 photo.SEPTA Silverliner IVs approach Temple. FujiFilm XT1 photo.Interior of a Bombardier coach. Lumix LX7 photo.SEPTA Silverliner IV interior. Lumix LX7 photo.SEPTA at 30th Street Station. Lumix LX7 photo.
These digital photos were made using my Lumix LX7 and FujiFilm XT1 digital cameras.
Dusk is a mystical time to photograph; highlights are subdued, shadows are deep, while the prevailing light is soft and cool. Window light is equivalent to the outdoors, and railroad signal light seems more intense.
The short SEPTA line to Cynwyd in the northwestern Philadelphia suburbs is a vestige of Pennsylvania Railroad’s Schuylkill Valley line that once reached northward into anthracite country.
Today Cynwyd is the end of the line.
Until last week, it was one of the last segments of SEPTA’s Regional Rail network left for me to travel.
I arrived at dusk, and in that ‘blue hour’ and I made these photographs using my Lumix LX7 and FujiFilm XT1 digital cameras.
All things being equal I would have used a tripod, but I didn’t have one so with the XT1, I boosted the ISO to unusually high levels to compensate for the dim conditions.
FujiFilm XT1 with Zeiss 12mm lens. ISO 1600.FujiFilm XT1 with Zeiss 12mm lens. ISO 1600.Lumix LX7 ISO 200.FujiFilm XT1 with 18-135mm Fujinon lens. ISO 1600.FujiFilm XT1 with 18-135mm Fujinon lens. ISO 3200.
I’m posting from Amtrak’s WiFi on-board the Vermonter enroute to Windsor Locks, Connecticut.
It’s cold, wet, dim outside.
Here’s a few views from my Lumix LX7 at Trenton, New Jersey, exposed just a little while ago.
View from McDonalds at Trenton Transportation Center. November 13, 2017.Amtrak train 172 arrives at Trenton.Looking toward New York City.Pan photo of an arriving NJ Transit train.
Keystone train with old Metroliner Cab car.
Amtrak train 56, the Vermonter arrives at Trenton.
I made these views of a CSX freight operating on the former Reading Company in Philadelphia. My vantage point was from the sidewalk on the road bridge near the Strawberry Mansion Bridge over the Schuylkill.
The day was bright, but partially overcast, which benefitted my photography since bright sun would have resulted in a difficult and unflattering high-contrast situation.
This northward freight was moving slowly, allowing me to work with two digital cameras and expose a series of images as it went by.
Exposed using a FujiFilm XT1 with 18-135mm zoom lens.A wider view from the same vantage point exposed with my Lumix LX7.The lighting post provides a hint as to the location ‘City of Phila.’ Lumix LX7 photo.Trailing telephoto view with the FujiFilm XT1 with 18-135mm zoom. This offers some interesting roof detail of the General Electric diesels hauling the train.
To the uninitiated a cold windy rainy night might not seem like a good time to make urban photographs.
In my eye this is a fantastic opportunity to make unconventional images.
My brother and I planned to ride SEPTA’s No. 15 streetcar along Girard Avenue to have burgers and beer at Johnny Brenda’s located on Girard near the crossing of the Market-Frankford rapid transit line.
I worked with my Lumix LX7 hand-held to expose this selection of images.
Some of the street views were exposed using the Lumix’s ‘night mode’ that exposes a burst of images in rapid succession and combines them in-camera as a composite.
As you can see it was really lashing down and the most difficult part of this exercise was keeping the lens dry.
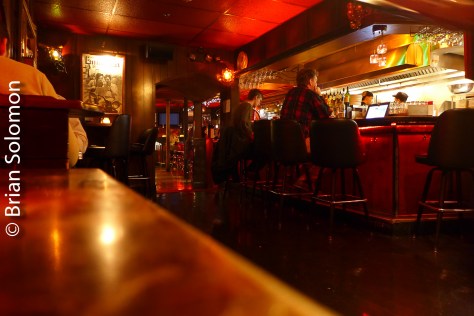
A Lumix LX7 night-mode image composite exposed at Girard and 41st Street.A Lumix LX7 night-mode image composite exposed at Girard and 41st Street.On a route 15 PCC car.The back of the PCC car near the end of the run.PCC’s pass on Girard near the Market-Frankford line elevated. Exposed handheld in ‘A’ mode.A Lumix LX7 night-mode image composite exposed at Girard Avenue and Frankford Street.A PCC takes the corner from Girard onto Frankford.This was made with a relatively long exposure for a handheld photo.Johnny Brenda’s bar was a welcome refuge from the rain.Beneath the old elevated railway crossing Girard. Sorry no PCC’s, I wasn’t in the mood to get any more wet that necessary to get home!
It’s dusk and too dark for a conventional photograph without boosting the ISO to high levels.
So, I opt for a panned image, where I use a comparatively slow shutter speed and move the camera to follow the motion of the subject.
I’ve found that it helps to pick a point on the vehicle and stay with it.
It also helps to begin panning well before the shutter is released and continue to pan without changing your overall motion after the picture has been made.
This last part is crucial. Many pans are ruined when the photographer stops panning (or slows) at the very moment the shutter is released, which unfortunately can be a natural inclination that must be overcome with practice.
I exposed this pan-image of a SEPTA Route 15 PCC car on Girard Avenue on November 5, 2017.Screen shot showing Lumix LX7 EXIF data including shutter speed, ISO and f-stop.
Using my Nikon N90S with a Nikkor AF 35mm lens, I exposed these Provia 100F slides at Rome’s Porta Maggiore in September 2017.
I often expose color slides in addition to digital images.
I scanned the slides using a Nikon scanner with VueScan software. My initial scans are made at very high resolution (4000 dots per inch or higher) and then using Lightroom I scaled these for internet presentation.
Are these photos better than the digital images? I don’t know. My film photos have different characteristics than the digital images. Also, I like to give slide shows and I find it’s much easier and more satisfying to project original color slides than put together digital presentations.
Slide film works well in certain contrasty situations such as this one.An antique narrow gauge tram makes a station stop near a centuries old Roman wall at Porta Maggiore.
Early November is a great time to photograph along the Hudson.
I made these views from the one-time Erie Railroad terminus at Piermont, New York.
Amtrak’s westward Lake Shore Limited catches the glint of the evening sun near Dobbs Ferry, New York. Meanwhile, a Metro-North electric multiple unit is rolling toward Grand Central.
Exposed using a FujiFilm XT1 with 28-135mm Fujinon lens fully extended. (Equivalent to a 200mm view on a traditional 35mm film camera)
Meet on the old New York Central Hudson Division.Looking across the wide expanse of the Hudson River toward Dobbs Ferry.
Would a longer lens have produced more effective photos?
(I wish I’d brought my Canon 100-400mm. Maybe next time!).
I avoid shrouding my work in mystery and I’ve happily discussed my technique, tools and materials with anyone who asks. This can lead to some interesting conversations, but also some peculiar observations.
Over the years, various people have offered curious comments on my photography (not including the written comments that appear in response to Tracking the Light). Below are some of the most memorable:
1) Commenter, “I like your slides, what sort of film do you use to make the photos?”
Me, “Kodachrome 25”.
Commenter, “Kodachrome 25! Isn’t that too slow?!”
2) Commenter, “That’s a beautiful scene but I didn’t think it would make a good photograph.”
3) Commenter, “Here’s a tip for you son, your photos are too head on, I couldn’t read the words on the side of the trains.”
4) Commenter, “I like your photo of the sunset, if I want to make a photo like that, which filter should I use?”
Me, “I don’t know, I didn’t use a filter.”
Commenter, “Yes, but if I was to used a filter, which one should I use?”
5) Commenter (via a 3rd party), “I don’t like Brian Solomon’s photography, it shows too many trees!”
6) Commenter, “You shouldn’t be making photos at night, it’s a waste of film!”
7) Commenter, “You still use film?!!”
8) Commenter, “So how are you adjusting from the transition to digital?”
Me, “I still haven’t adjusted from the transition to color.”
9) Commenter in regards to my Lumix LX3, “I can’t believe that YOU use THAT!”
10) Commenter in regards to a photo of Amtrak’s Lake Shore Limited in the Berkshires, “That’s a beautiful photograph, pity about the train.”
I made this image of a Southern Pacific eastward intermodal freight from the Book Cliffs in Utah near Floy back in 1996 when I was Editor of Pacific RailNews. At the time I worked with Nikons and exposed this view on Fujichrome. You can see a row of trees way in the distance along the Green River.
The other morning at Pan Am’s East Deerfield yard I met up with Tim, a fellow photographer.
He asked, ‘Are you going to take that?’—meaning the sunrise over the yard.
‘Yeah, since we’re here. Why not?’
I’ve only made countless photos of this yard in the morning, but that’s never stopped me before.
For this image, I exposed Ilford Pan F black & white film (ISO 50) using a Leica IIIA with Nikkor f3.5 35mm lens. With handheld meter to gauge the lighting, I exposed this frame at f3.5 1/60th of a second.
My aim was to capture detail in the sky and allow the tracks and yard to appear as a silhouette.
East Deerfield Yard looking east at sunrise. October 2017.
I processed my film as follows: Kodak D76 mixed 1 to 1 for 6 min 30 seconds at 68F, followed by stop bath, 1st fix, 2nd fix, 1st rinse, Permawash, 2nd rinse, then 9 min selenium toner mixed 1 to 9 (one part toner to nine parts water), 3rd rinse, permawash, 4th rinse.
After scanning the negative with an Epson V750 Pro flatbed scanner, I made a few nominal adjustments to contrast using Lightroom, while removing unwanted dust-specs.
My Lumix LX7 has an ‘high-dynamic range’ feature. Otherwise known by its initials ‘HDR’, high-dynamic range is a technique for digital imaging that allows greater detail in highlights and shadows by combining several images of the same subject that were exposed at different values.
The LX7 includes the HDR setting as one of the options in ‘scene mode’ (SCN on the selection dial). This rapidly exposes a sequence of images and combines them in-camera to produce a single HDR JPG. Obviously you need to hold still when you make the photo.
Also it helps to photograph a static scene or the result my get a bit weird.
In this instance, I photographed some flowers on the platform of NI Railway’s station at Whitehead, Co. Antrim (Northern Ireland).
This is my HDR composite photograph. The camera automatically exposes a burst of images at various exposure settings and combines them in-camera to produce a single image with greater shadow and highlight detail than is normally possible with a single frame.
There are other ways of accomplishing a similar result.
So I decided to compare the HDR with some manipulated versions of a camera RAW file that I exposed of the same scene. With the RAW images, I’d adjusted the file with Lightroom post processing software, selectively altering contrast, gamma, and colour saturation and colour temperature to make for a more pleasing photograph.
Specifically I applied a digital graduated neutral density filter, while making global changes to highlights and saturation.
The output of the RAW is also as a JPG, which I scaled for presentation here.
This view is from a single RAW file exposed with the Lumix LX7 and manipulated digitally to maximize highlight and shadow detail. This is my first of two manipulations.This is a more intensively manipulated file than the image immediately above. Again this image was from a single camera RAW file. This one features slightly darker highlight values.
I made two versions of the RAW interpretation.
In both sets of images I’ve intentionally focused on the flowers and not the NIR train.
This is a follow up to yesterday’s post on NI Railway’s Moira Station.
I’m always looking for a different angle, and I found a variety of ways to photograph Moira last Sunday.
The vantage points for these photos were all within a one-minute walk of each other.
Exposed digitally using a FujiFilm XT1 with 90mm lens.Exposed digitally using a FujiFilm XT1 with 90mm lens.Lumix LX7 digital photograph.A view from the road near the station. Lumix LX7 photo.
This is among the hundreds photos I chose for final consideration for my book on European Railway Travel. It is not an outtake. Instead this is among my selections for the section on railways of Great Britain.
Exposed on 3 May 2016 using my Lumix LX7. This image was adapted from the camera RAW image for maximum dynamic range.
In the text I discuss the great London terminals, and I use this photo to illustrate Kings Cross. I like it because it features a vintage HST in nice light with a dynamic view of the classic train shed beyond.
The HST (High Speed Train) was introduced by the then nationalised British Railways (BR) in the mid-1970s as the Intercity 125.
As a 125 mph train capable of operating on many existing lines with minimal changes to infrastructure and signaling this represented a significant improvement over older trains that allowed BR to speed schedules and more effectively compete with other modes.
More than 40 years later, many of the old HSTs are still on the move.
Exposed on 3 May 2016 using my Lumix LX7. This image was adapted from the camera RAW image for maximum dynamic range.
Another example of some photos that didn’t make the final cut for my book on European Railway Travel.
You might think that catching a train with medieval castles in the background is pretty neat.
It is.
But I have many photos at this curve at Oberwesel on the busy Rhein left bank route. I’ve selected several potential candidates from this excellent German location and these two just didn’t seem book worthy.
As mentioned last week, I’m in the final lap of assembling a book on European Railway travel.
This image is among my ‘outtakes’ from the section on Germany.
I have hundreds of photos along the Rhein. I like this one because it shows the twin tunnels on the right bank opposite Oberwesel, but the wires in the sky annoy me, as does the clutter in the river at right and shrub on the left.
There’s better photos to select from for my book.
A Swiss Cargo freight works forward along the Rhein in September 2015. Really? That was two years ago? Gosh, where does the time go? Exposed with a FujiFilm XT1.
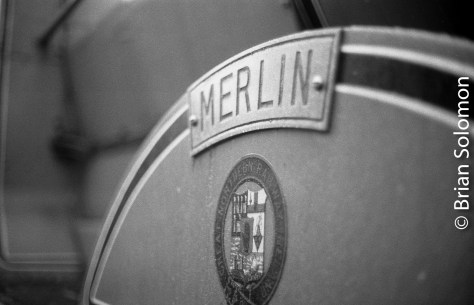
It’s undoubtedly all wrong. It was nearly dark and raining steadily when I exposed these photos of former Great Northern Railway (of Ireland) V-Class 4-4-0 number 85 Merlin at Lisburn.
This is a follow up post from my digital views of the same evening titled Steam in the Rain: RPSI Steam & Jazz at Lisburn—25 August, 2017 that appeared on Tracking the Light a couple of weeks ago. Honer Travers had brought me down to Lisburn to watch 85 arrive and introduce me to the crew.
Working in low light, exposed these photos on Fomapan 100 Classic using my battle worn Nikon F3 with an old non-AI f1.4 50mm lens.
My exposure times ranged from 1/30th to 1/8th of a second, and all photos were made handheld. I processed the film in Ilford Perceptol stock solution for 5 minutes 45 seconds at 71 degrees F.
By panning vertically I aimed to convey a sense of motion. Notice that the buffer beam on 85 is sharp.Trailing view at the footbridge in Lisburn.
1/8th of second at f2.
By using the lens wide open, I was working with shallow depth of field and a comparatively soft overall view. While the slow shutter speed allowed for motion blur. These are not conditions conductive to making razor sharp images. So I had no intentions of doing so.
Sometimes making softer, more interpretive images better conveys the spirit of the scene than clinically sharp images with over the shoulder light.
Think about it? How many different type of light will you work with?
I know a fair few sunny-day photographers. No sun, no photo.
I know others who only come out at night.
I have my favorite types of light and preferred angles, but I’ll photograph in a variety of situations.
There’s your old standby; ‘over the shoulder three-quarter sun’.
But there’s lots of types of sun and angles; clear cloudless mid-morning sun is nice; how about side-lit midday sun? Or hazy backlit sun?
Hazy cross-lit sun with white sky.
Then there’s; low sun, glint, and the full back-lit sunset silhouette.
Of course with glint, you can subdivide it any number of ways; hard glint (silver glint), soft glint, golden glint, etc.
Likewise with overcast lighting. Not all cloudy days cast the same light.
Perhaps the most difficult is when the darkest cloud is above you and the rails glisten silver and the sky is white (but bright) off in the distance.
Then there’s rain; light rain, hard rain, driving rain, and ‘#@*#@@!!!! what am I doing out in this?!’ rain. Then there’s; sun and rain, and rainbow with dark sky.
Also; light falling snow, falling powdery snow, heavy falling snow, and one of my favorites; heavy falling snow with cross-lit sun’.
Then the next day: light snow on ground, heavy snow on ground, VERY heavy snow on ground. Then after it warms up; dead dirty snow.
Evening dusk with a hint of blue; evening dusk with stars twinkling. Evening dusk with comet (I’ve got it!), and even better, morning twilight with comet (got that too).
Then you have your mists and fogs; light fog, heavy fog, and mist clinging to top of hill in distance with full morning sun in foreground (another old favorite).
Night with stars; night with half moon, night with full moon; sodium vapor light, mercury vapor light; florescent light; incandescent light; and mixed electric light.
I like some of the specialized lighting effects such as ‘cathedral light’ where daylight is allowed to pierce shadows indirectly from the side, with no direct daylight in the scene. (Best accomplished in a snow shed, under a highway bridge, or in a train shed.)
There’s; train lost in shadow of its own exhaust backlit by rising sun.
And; everything in scene covered in hoar frost, backlit by rising run.
Not to mention; train in silhouette against fog bank in front of hill backlit by rising sun.
There’s more, but I bet I’ve lost some readers already.
Tracking the Light Discusses Photography Everyday.
I realize that today’s title might not catch everyone’s eye.
How about: ‘Clean GM Diesel on a Freight’?
Or, ‘Irish Rail at Rush Hour’ ?
‘Gullet Glint’?
Anyway, this post is about light.
I was waiting on the Up IWT liner (International Warehousing & Transport Ballina, County Mayo to Dublin Northwall container train)with recently painted Irish Rail 071 class diesel number 082.
Just ahead of this Dublin-bound freight was the Up-Galway passenger train with a common set of ICRs (InterCity Railcars).
I was photographing into the sun. My intent was to work the glint effect. (That’s when the sun reflects off the side of the train).
Usually, I find this is most effective when you shade the front element of the lens to minimize flare. Notice the two variations with the ICR.
By shading the front element I’ve prevented the rays of the sun from directly hitting the front element of my lens, thus minimizing the effects of flare.In this view, exposed moments after the photo above, I’ve allowed the sun to hit the front element to show the effects of flare. This small adjustment can produce very different results. Often I aim to control the amount of flare; a little bit lightens shadows and adds some colour to the scene but too much can result in unpleasant and unnatural looking light streaks or light fog.
By the time the freight reached me clouds had partly shaded the sun leaving only a hint of back-lighting.
All the photos were made using my FujiFilm XT1 with 90mm f2.0 lens. The camera RAW Files were all adjusted for colour balance, colour saturation and contrast using the same ratio of change. (In other words, although I’ve manipulated the final result, all the photos have received the same degree of alteration).
The clouds shaded the sun for me here.In this image, I adjust the exposure on site to compensate for the clouds blocking the sun.