Category Archives: Tips and Technique

High Dynamic Range Experiments—Summer 2014.

Playing with the LX7.

Among the built-in features of the Panasonic LX7 is a HDR—High Dynamic Range—setting in ‘Scene Mode’.

The theory behind HDR is the ability to produce a digitally exposed photograph with better highlight and shadow detail through post-processing blending of two or more images of the same scene exposed at different light settings. (In other words, a multiple exposure).

A common way to accomplish this is to place the camera on a tripod and make three images of identical composition with one image over-exposed (too light), one normally exposed, and one underexposed (too dark). Then combine all three images as multiple exposure.

When done effectively this can be used to overcome the limited dynamic range inherent to digital sensors. It can also be used creatively through extreme exposure variations to produce some outlandish images with nightmare skies and penetrating shadows.

The LX7s feature makes exposing a basic HDR style image exceptionally easy as the camera automatically takes three photos in rapid sequence and processes them immediately in-camera to produces a blended Jpg available for viewing.

I found this most effective in high contrast scenes, such as sunsets, that might be difficult to capture because of the camera’s limited exposure range. In other situations, it seems to flatten the contrast and doesn’t necessarily make for a more pleasing photograph.

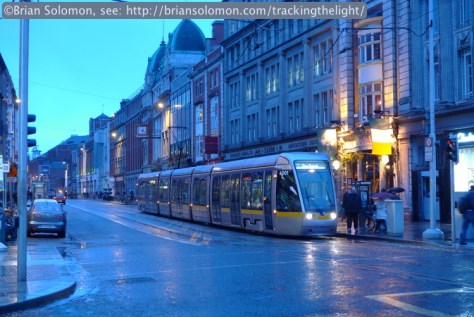
Another point, if the scene isn’t static, ‘ghosting’ will occur of moving elements. My sense is that camera’s software must have a comparative feature that attempts to minimize the effect of ghosting, but the results can appear unnatural if not outright bizarre. Especially, when the subject, say a passing locomotive, become transparent!

Below are a few of my experiments. With most I’ve first included a comparison image (an ordinary non-HDR photo) exposed in the normal way.

This is the non-HDR normal photo. I've intentionally selected a high contrast scene to test the difference between a normal image and the HDR. Princeton Junction, exposed with Lumix LX7 in 'A' mode.
This is the non-HDR normal photo. I’ve intentionally selected a high contrast scene to test the difference between a normal image and the HDR. Princeton Junction, exposed with Lumix LX7 in ‘A’ mode.
Exposed in HDR mode. Notice that this does a much better job of retaining shadow and highlight detail. Princeton Junction, exposed with Lumix LX7 in HDR 'scene' mode.
Exposed in HDR mode. Notice that this does a much better job of retaining shadow and highlight detail. It is easier to see into the cab of the train and the clouds are better separated from the blue sky. Princeton Junction, exposed with Lumix LX7 in HDR ‘scene’ mode.
This NJ Transit train had paused at Princeton Junction in high midday June sun making for an ideal opportunity to test the effect of HDR. This my 'normal' non-HDR comparison image. Note the nearly opaque underside of the locomotive where wheels and equipment are lost in an inky black. Princeton Junction, exposed with Lumix LX7 in 'A' mode.
This NJ Transit train had paused at Princeton Junction in high midday June sun making for an ideal opportunity to test the effect of HDR. This my ‘normal’ non-HDR comparison image. Note the nearly opaque underside of the locomotive where wheels and equipment are lost in an inky black. Princeton Junction, exposed with Lumix LX7 in ‘A’ mode.
This is the HDR photo of the same scene. By using multiple exposures, the HDR feature has added detail to the shadows making equipment on the underside of the locomotive more visible. I'm not sure if I like the effect on the trees, which to me seem like a painted backdrop compared with those in the normal photo above. Princeton Junction, exposed with Lumix LX7 in HDR 'scene' mode.
This is the HDR photo of the same scene. By using multiple exposures, the HDR feature has added detail to the shadows making equipment on the underside of the locomotive more visible. I’m not sure if I like the effect on the trees, which to me seem like a painted backdrop compared with those in the normal photo above. Princeton Junction, exposed with Lumix LX7 in HDR ‘scene’ mode.
I thought I'd try the HDR feature on a rapidly moving train. Here one of Amtrak's Keystone trains is passing Princeton Junction at speed. Notice the effect of double exposure where the cab car is ghosted into the coach. This is curious aberration, but probably not the best solution for railway action photography.  I don't have a 'non'-HDR image of this scene. Princeton Junction, exposed with Lumix LX7 in HDR 'scene' mode.
I thought I’d try the HDR feature on a rapidly moving train. One of Amtrak’s Keystone trains is passing Princeton Junction at speed. Notice the effect of double exposure where the cab car is ghosted into the coach. This is curious aberration, but probably not the best solution for railway action photography. I don’t have a ‘non’-HDR image of this scene. Princeton Junction, exposed with Lumix LX7 in HDR ‘scene’ mode.
This high contrast scene at Overbrook, Pennsylvania in early July 2014, made for another opportunity to make comparisons. This is the 'non-HDR' image, exposed with Lumix LX7 in 'A' mode.
This high contrast scene at Overbrook, Pennsylvania in early July 2014, made for another opportunity to make comparisons. This is the ‘non-HDR’ image, exposed with Lumix LX7 in ‘A’ mode.
SEPTA at Overbrook, exposed with Lumix LX7 in HDR 'scene' mode.
SEPTA at Overbrook, exposed with Lumix LX7 in HDR ‘scene’ mode.
Sunset at CP83 in Palmer, Massachusetts. Owing to the extreme contrast of the scene, I opted to expose for the sky in the normal (non-HDR) image. If I exposed to make the tracks lighter, I'd lose the effect of the sunset. Exposed with Lumix LX7 in 'A' mode.
Sunset at CP83 in Palmer, Massachusetts. Owing to the extreme contrast of the scene, I opted to expose for the sky in the normal (non-HDR) image. If I exposed to make the tracks lighter, I’d lose the effect of the sunset. Exposed with Lumix LX7 in ‘A’ mode.
Here's the HDR image. While it retains sky and track detail, it radically altered the effect of sunset. Is this a more realistic portrayal of the scene? Exposed with Lumix LX7 in HDR 'scene' mode.
Here’s the HDR image. While it retains sky and track detail, it radically altered the effect of sunset. Is this a more realistic portrayal of the scene? Exposed with Lumix LX7 in HDR ‘scene’ mode.
View of an Irish Rail ballast train at Islandbridge Junction in Dublin. This is the 'non-HDR' comparison, exposed with Lumix LX7 in 'A' mode.
View of an Irish Rail ballast train at Islandbridge Junction in Dublin. This is the ‘non-HDR’ comparison, exposed with Lumix LX7 in ‘A’ mode.
While waiting for the ballast train to get the signal, I took the opportunity to make an HDR comparison. It was free, so why not? However, I don't think this improved the scene, now it just looks washed out to me. Exposed with Lumix LX7 in HDR 'scene' mode.
While waiting for the ballast train to get the signal, I took the opportunity to make an HDR comparison. It was free, so why not? However, I don’t think this improved the scene, now it just looks washed out to me. Exposed with Lumix LX7 in HDR ‘scene’ mode.

This is a work in progress, and I’ll follow up in more detail in a later post.


Tracking the Light posts new material every morning.

Please spread the word and share Tracking the Light with anyone who may enjoy seeing it!

http://briansolomon.com/trackingthelight/


Alco Diesels at Emporium, Pennsylvania.

Experiments with a Digital Camera.

On the afternoon of February 6, 2010, Pat Yough, Chris Guss and I were photographing along the former Pennsylvania Railroad at Emporium, Pennsylvania. This route is operated by the Western New York & Pennsylvania, a short line famous for its late-era use of Alco Century diesels.

I was primarily photographing on Fujichrome using my pair of Canon EOS-3, however, I was experimenting with my relatively recently acquired Panasonic Lumix LX3.

Western New York & Pennsylvania’s westward Driftwood Turn (the ‘DFT’) was switching near a grade crossing in nice winter sun. This gave me ample opportunity to try various modes with the Lumix, so I varied the aspect ratio (the parameters of the frame) and sampled various built-in color profiles.

Lumix LX3 set at 16:9 aspect ratio with standard color profile.
Lumix LX-3 using 16:9 aspect ratio in the vertical.
Lumix LX3 using 16:9 aspect ratio in the vertical. An annoying wire has interfered with my composition!
Here I selected the 4:3 aspect ratio which maximizes the use of the sensor. I selected the 'Natural' color profile which is slightly less saturated than 'Standard'.
Here I selected the 4:3 aspect ratio which maximizes the use of the sensor. I selected the ‘Natural’ color profile which is slightly less saturated than ‘Standard’.
I wanted to see how the digital camera would cope with extreme backlighting and flare.
I like the sunburst effect but I was disappointed by the lack of highlight detail. I found that the Lumix couldn't match the dynamic range of Fujichrome, which limits its ability to capture high contrast situations. My LX-7 has an 'HDR' feature that partially overcomes this problem, but is only useful for static situations (topic for another post).
I like the sunburst effect but I was disappointed by the lack of highlight detail. I found that the Lumix couldn’t match the dynamic range of Fujichrome, which limits its ability to capture high contrast situations. My LX-7 has an ‘HDR’ feature that partially overcomes this problem, but is only useful for static situations (topic for another post). 16:9 aspect ratio; ‘Standard’ color profile.

I was curious to see how the camera handled backlighting and flare, so I made a few cross-lit silhouettes to push the limits of exposure. These are a few of my results. The files are unaltered except for scaling for internet display. I haven’t adjusted color or exposure in post processing, nor have I cropped them.

As regular readers of Tracking the Light are aware, since that time, I’ve made great use of the LX3. I wore it out, and a few months ago I replaced it with a Panasonic Lumix LX7, which is an even better camera.

Tracking the Light posts new material every morning.

Please spread the word and share Tracking the Light with anyone who may enjoy seeing it!

http://briansolomon.com/trackingthelight/

Tomorrow: LX3 versus LX7!


American River Canyon in October Snow.

Union Pacific on Donner Pass; Standing in Steinheimer’s Footsteps.

Among my favorite locations in California is the spectacular overlook at ‘American’ or ‘Old Gorge’ (if you have a really old time-table) located on the former Southern Pacific crossing of Donner Pass east of Alta.

Here the railroad crawls out on ledge high above the waters of the American River. It’s a on sustained 2.2 percent grade, so eastward trains are in full throttle which makes for sublime sound show.

I was in position on an overcast afternoon, October 30, 2003. The American River Canyon was filled with a thick fog. To the west I could hear traditional EMD 16-645E3 diesels roaring in Run-8. That meant SD40-2s. Real locomotives.

Exposed on Kodak Tri-X with I processed by hand in San Francisco. After initial processing I toned the negatives in a selenium solution mix 1:9 with water for 9 minutes, 1 minute agitation (in a well-ventilated area).
Exposed on Kodak Tri-X which I processed by hand in San Francisco. After initial processing I toned the negatives in a selenium solution mix 1:9 with water for 9 minutes, 1 minute agitation (in a well-ventilated area).

As the train approached, the atmospheric pressure changed and the fog rose out of the canyon and enveloped me. Although it was only the day before Halloween, all of sudden it began snowing furiously. Visibility dropped to nil, and the roar of the eastward freight grew intense.

Working with my Rolleiflex Model T loaded with Kodak Tri-X, I exposed a series of images. It was a memorable moment on Donner.


Union Pacific SD40-2s emerge from the fog and snow at ‘American’ on their ascent of Donner Pass.

Tracking the Light posts new material every morning.

Please share Tracking the Light!

http://briansolomon.com/trackingthelight/

Tomorrow: Irish Narrow Gauge Sunset.


A Big Topic!

But What’s the Subject?

Transportation; Railroads; Railways; Railway Photography, that’s what I photograph. Right?

But what’s the actual subject? What should I focus on? More to the point; what is interesting? And, is today’s interesting subject going to be interesting tomorrow?

Looking back is one way to look forward.

Yet, there lies a paradox: When I look back over my older photos, I regret not having better skills to have consistently made more interesting and more varied images. And also, for not being more aware of what was interesting.

Conrail at signals 81.81 near Palmer, Massachusetts c1983.  What was my subject? (If you know me, you'll know the answer—hint it's not the westward freight train!). Exposed with a Leica 3A with 50mm Summitar lens.
Conrail at signals 81.81 near Palmer, Massachusetts c1983. What was my subject? (If you know me, you’ll know the answer—hint it’s not the westward freight train!). Exposed with a Leica 3A with 50mm Summitar lens.

The lesson is then is about skill: learn to vary technique, adopt new approaches and continually refine the process of making photos while searching for interesting subjects. (The searching is the fun part!)

A truly successful image is one that transcends the subject and captures the attention of the audience.

So, is railway photography really about the subject?

Should all railway photos be serious? Seriously?  Waukesha, Wisconsin, back in the day.
Should all railway photos be serious? Seriously?
Waukesha, Wisconsin, back in the day.
Are railroads all about locomotives?
Are railroads all about locomotives? Here’s a real stack train that looks like a model.
I was standing next to Jim Shaughnessy for this one! Surely that makes it a better photo, right? October 2004, Cuttingsville, Vermont.
Sometimes, it helps to get up close and check for details.
Sometimes it helps to get up close and check for details.
Can you get too close? Ektachrome 100VS with a Nikon F3T and Nikkor 24mm lens.
Do old Alcos make better subjects? Slateford Junction at the Delaware Water Gap, September 17, 2007.
Lonely tracks at Eagle, Wisconsin c1996. I waited, but the train didn't show up.
Lonely tracks at Eagle, Wisconsin c1996. I waited, but the train didn’t show up.
Fill the frame, don't waste space, more train, that's what its all about, always! Right??
Fill the frame, don’t waste space, more train, that’s what its all about, always! Right??

Tracking the Light posts new material every morning.

Please share Tracking the Light!

http://briansolomon.com/trackingthelight/

Ottignies—13 Minutes to Change Trains

Making the Most of It.

Belgium’s Société Nationale des Chemins de fer Belges (Belgian National Railways or SNCB) operates a top-notch passenger network with interval frequencies on most routes. This works on a hub and spoke system, where planned changes allow passengers a great variety of destinations.

New EMUs bask in the sun at Ottignies on an August 2014 evening. Lumix LX7 photo with the 'Vivid' colour profile.
New EMUs bask in the sun at Ottignies on an August 2014 evening. Lumix LX7 photo with the ‘Vivid’ colour profile.

On an August 2014 evening, I arrived at Ottignies from Charleroi on my way to La Hulpe in the Brussels suburbs. My journey itinerary gave me 13 minutes to change from one train to another.

Ottignies is an old school station with traditional platforms and canopies. While this can’t last forever, I’ll take its situation as a blessing. Refurbished stations are fine for passenger utility, but offer less in the way visual character.

Since I’d changed here previously, I had a sense for where the light would be.

That’s right! I had precisely 13-minutes to make photographs, and I was prepared to make the most of it! (And yes, I exposed some colour slides too. You know, for the record.)

My Lumix has an HDR (high dynamic range) feature that takes a rapid fire sequence of three images and blends them in camera. This increases highlight and shadow definition and produces more even contrast. The subject(s) need to be static however or the feature doesn't work so well.
My Lumix has an HDR (high dynamic range) feature that takes a rapid fire sequence of three images and blends them in camera. This increases highlight and shadow definition and produces more even contrast. The subject(s) need to be static however or the feature doesn’t work so well.
New sign with old canopies and platforms, a good compromise. An old General Motors powered diesel lurks in the yard beyond. Lumix LX7 photo.
Well now this is a bonus. An old SNCB class 55 diesel with a Colas ballast cleaner. Lumix LX7 photo.
Colas is a company with a hand in many businesses. They run trains in the UK too.
This high contrast scene made for a perfect opportunity to test the capabilities of the HDR feature. I think it did a respectable job of holding detail while balancing contrast. Lumix LX7 in HDR 'scene mode'.
This high contrast scene made for a perfect opportunity to test the capabilities of the HDR feature. I think it did a respectable job of holding detail while balancing contrast. Lumix LX7 in HDR ‘scene mode’.
Ottignies is a busy station. As I was focused on the ballast cleaning train, a southward InterCity train arrived. I made a colour slide of it as it glided to a stop then repositioned for this view with my Lumix in HDR 'scene mode'.
Ottignies is a busy station. As I was focused on the ballast cleaning train, a southward InterCity train arrived. I made a colour slide of it as it glided to a stop then repositioned for this view with my Lumix in HDR ‘scene mode’.
I reverted to the Vivid colour profile without the benefit of HDR for this low angle view of this SNCB class 18. This is a Siemens Vectron and the same basic locomotive design that Amtrak is now using on the North East Corridor. Lumix LX7 photo.
I reverted to the Vivid colour profile without the benefit of HDR for this low angle view of this SNCB class 18. This is a Siemens Vectron — the same basic locomotive design that Amtrak is now using on the North East Corridor. Lumix LX7 photo.
My train arrived and I took a seat on the upper deck. This was a contrast from the old single-level electric that I'd traveled on up from Charleroi. I was heading toward Brussels in the rush hour, so I was moving counter flow. Lumix LX7 photo at Ottignies, Belgium.
My train arrived and I took a seat on the upper deck. This was a contrast from the old single-level electric that I’d traveled on up from Charleroi. I was heading toward Brussels in the rush hour, so I was moving counter flow. Lumix LX7 photo at Ottignies, Belgium.

Tracking the Light posts new material every morning.

Please share Tracking the Light!

http://briansolomon.com/trackingthelight/


Take a Ride on the SNCB

Charleroi to La Hulpe.

My time in Charleroi had come to a close. My next destination was La Hulpe in the suburbs south of Brussels. While I anticipated taking an Société Nationale des Chemins de fer Belges (Belgian National Railways or SNCB) train to Brussels and changing trains there, the ticket seller convinced me to try another option.

“It’s cheaper and faster to travel to Ottignies.” Ok, why not.

When I went up to platform 3A at Charleroi Sud, what appeared to be the oldest train in Belgium rattled in to collect me. I ended up riding a line I previously didn’t even have on my map (this turns out to be line 140).

While the train’s inside was nicely refurbished, it retained openable windows, a rare treat in today’s world of train travel.

No sooner than I boarded the train and the rain began, again. But after a while the sun came out and so I made a series of images using my Lumix LX7, which I was able to hold out the window at arms-length  while keeping a sharp eye on the rear display screen.

Exposed with a Lumix LX7 with built in neutral density filter engaged, 1/3 second at f8, 80 ISO. Handheld with aid of built in image stabilizer. Looking away from the direction of travel.

Among the Lumix LX7s features are a built in neutral density filter and image stabilizer. This allowed me to make relatively long exposures in bright daylight while keeping the camera steady.

SNCB’s track is flawless, and the heavy aged train provided a solid, nearly vibration-free ride, allowing me to expose a series photos using long shutter speeds intended to blur the tracks and countryside while keeping the train sharp.

Hooray for old trains on good track!

Exposed for 1/8 second at f8, 80 ISO with neutral density filter. The ND filter cuts the exposure by two full stops, so without it my exposure time would have been about 1/30 of a second. Enough for a bit of blur, but not enough for the appropriate effect.

Tracking the Light posts new material every morning.

Please share Tracking the Light!

http://briansolomon.com/trackingthelight/


Chicago & North Western at Adams, Wisconsin

Classic Kodachrome, September 23, 1995.

My intent of this image was to show a simple juxtaposition between C&NW GP9 4153 and the steam-era coaling tower in the distance.

Exposed on Kodachrome 25 using a Nikon F3T with f4.0 200mm Nikkon telephoto lens.

By this late date, steam was four decades gone, and C&NW was already part of the Union Pacific system, having been absorbed just a few months earlier. Yet, despite UP being the operating company; in Adams, Wisconsin things still appeared to be business as usual on old C&NW.

To put the GP9 and coaling tower in relative perspective, I used my Nikon F3T fitted with a 200mm lens, and found a suitable angle at a distance from both subjects. My aim was to minimize extraneous elements and focus on the railroad interest.

Since the locomotive was static, I used the opportunity to make photos from a variety of other angles. Some of these photos appeared in my book on EMD F-units published by Specialty Press about 2005.

Tracking the Light posts new material every morning.

Please share Tracking the Light!

http://briansolomon.com/trackingthelight/

Tomorrow a GP9 among massive trees . . . 


Wisconsin Central Limited, Byron, Wisconsin.

Sunset, June 2004.

Canadian National had acquired WCL a few years earlier, and while many through freights were operating with CN locomotives a few trains out of Fond du Lac were still assigned WCL SD45s.

I’d made a project out of recording the sounds of these 20 cylinder dinosaurs, while using choice moments to make photos.

This freight had struggled up from Valley siding, where its lead unit had warranted attention from the mechanical department before ascending the five-mile grade to Byron.

The freight was paused short of the grade crossing at Byron, and I exposed this view in the last throes of daylight using my Nikon F3 with Fujichrome slide film mounted on a Bogen tripod.

 I’ve exposed this view as a silhouette. Using my Minolta Mark IV handheld light meter in reflective mode, I sampled the mid section of the sky to calculate my camera settings then made a bracket of several exposures. While its easier to gauge exposure with a digital camera because you can see a result on-site, many digital cameras are limited when capturing a high contrast scene such as this one without making multiple exposures.

I’ve exposed this view as a silhouette. Using my Minolta Mark IV handheld light meter in reflective mode, I sampled the mid section of the sky to calculate my camera settings then made a bracket of several exposures. While it’s easier to gauge exposure with a digital camera because you can see a result on-site, many digital cameras are limited when capturing a high contrast scene such as this one without making multiple exposures.

As regular viewers of Tracking the Light might recognize, I’ve made a variety of photos at Byron, Wisconsin over the years. Key to this composition is my positioning of the codeline, which conveniently switches from one side of the tracks to the other just shy of the grade crossing.

Tracking the Light posts new material every morning.

Please share Tracking the Light!

http://briansolomon.com/trackingthelight/


Yamanote Loop, Tokyo

Smoggy Morning, April 1997.

In yesterday’s Tracking the Light post, I extolled the virtues of Kodachrome film as a medium for capturing trains on the move in the fading light tinted by atmospheric pollution.

I’ve made many fine glinty photos on Fujichrome films as well. And speaking of Fujichrome and air-pollution, what better way to combine these topics than to illustrate them with this image I made of a Yamanote Loop train in Tokyo.

I exposed this view on Fujichrome Provia 100F with my Nikon N90S with 80-200mm Nikkor zoom lens.

The sun was out, but a thick layer of smog was choking the Japanese capital, and what a wonderful filter it was too!

Look, it’s not my job to defend the planet against particulates, CO2, and etc, I have good friends that take care of that! (You know who you are). I just use the tools at hand, and a nice thick layer of air pollution can really add color to a photograph!

Tracking the Light posts new material every morning.

Please share Tracking the Light!

http://briansolomon.com/trackingthelight/


Amtrak E60 at Havre de Grace.

Classic Kodachrome.

On the evening of November 23, 1992, I was poised to photograph the action on Amtrak’s Northeast Corridor at Grace interlocking at Havre de Grace, Maryland.

I was interested in this angle specifically to use the glint light shortly before sunset. Kodachrome film had an exceptional ability to capture detail in the extreme contrast of sunset situations.

Although it had been a clear day, there was plenty of particulates in the air from tens of thousands of automobiles driving I-95 and adjacent roads. Almost invisible to the eye, this pollution acts as a reddish orange filter and changing the quality of sunlight toward the long end of the spectrum. Kodachrome with its red-bias amplified this effect while its great dynamic range maintained excellent detail in highlight areas.

Sunset on the Northeast Corridor on November 23, 1992.
Sunset on the Northeast Corridor on November 23, 1992. Exposed on Kodachrome 25.

Working with my Nikon F3T and f1.8 105mm Nikkor lens, I had only a few minutes before the sun disappeared behind the trees at the right.

Moments before the light changed, a late-running Florida train bound to Penn Station, New York glided into the scene with a 1970s-era E60CH electric in the lead. Perfect!

I made a couple exposures as the train passed.

Tracking the Light posts new material every morning.

Please share Tracking the Light!

http://briansolomon.com/trackingthelight/

Tomorrow: Smoggy Glint in the Land of the Rising Sun!


Irish Rail Ballast Train—July 28, 2014

Perspective with Dublin’s Wellington Testimonial

Irish Rail 088 leads the HOBS near Islandbridge in Dublin on July 30, 2014. Exposed with a Canon EOS 7D with 100mm lens.

Word came over the ‘telegraph’ that an Irish Rail HOBS (high output ballast system) train was on its way over to Islandbridge Junction to run around.

I’ve photographed the HOBS on previous occasions, but its one of the more unusual trains to catch on the move. This time, I thought I’d try a slightly different perspective from my standard location.

Using my Canon EOS 7D with 100mm lens, I framed the line up in a tight vertical view prominently featuring the Wellington Testimonial. This massive obelisk rises high above the Phoenix Park. It is claimed to be Europe’s largest, and it can be seen from all around Dublin.

I made several views . Unfortunately, while there was a big patch of blue sky behind me, the sun wasn’t fully out when the train arrived. So I had to do my best to work with what I had.

It didn’t take long for locomotive 088 to run around. Yet, I walked quickly, and I made and series of images of the train heading back into the Phoenix Park Tunnel.

Lumix LX7 view of the HOBS about pass into the Phoenix Park Tunnel on its way over to the North Wall. I modified the RAW file in Graphic Converter and Photoshop to improve the contrast using both global and localized adjustments.

The great thing about this exercise was the minimum time I had to wait around. Thanks to good contacts and prompt running (on the part of the HOBS) I scored several relatively unusual photos in just a few minutes!

Tracking the Light posts new material every morning.

Please share Tracking the Light!

http://briansolomon.com/trackingthelight/


The Marble City Rolls in the Evening—Part 3

A Long Delay Results in an Unexpected Opportunity.

We waited at milepost 17 near Sallins for the return of locomotive 461 with Railway Preservation Society Ireland’s The Marble City rail tour from Kilkenny.

After a bit of a delay, I’d became curious and tried phoning people on the train. After a few phone calls I learned that tragedy had delayed the excursion.

It was reported that Irish Rail’s regular Intercity train from Waterford was involved in a fatality on the line and the steam special was stranded at Athy while the Gardai (An Garda Síochána is the Irish name for Ireland’s national police force) conducted an investigation.

I was told by an RPSI member on the train that it would be at least 8pm before the train was on the move.

Lumix LX7 view of the line looking toward Dublin.

Instead of giving up and returning to Dublin, fellow photographer Hugh Dempsey and I opted to remain trackside. After all, only the Waterford trains were affected, so there would be plenty moving to photograph. And there’s the element of curiosity, just how late would the train be?

I took the opportunity to update some local people who had turned out to watch the steam special of its misfortune.

Later, a local man took pity on our prolonged wait, and dropped down to us with cups of hot tea and biscuits (cookies). In the mean time there was some nice evening light to photograph the ordinary procession of Irish Rail trains.

The Cork-Dublin Mark4 works toward Dublin with a 201-class diesel locomotive at the back. This meets an ICR working downroad. Canon EOS 7D photo.
Experimenting with the pan technique I exposed this view of a downroad ICR at milepose 17. With the same types of trains running every few minutes in the evening, I had lots of opportunity to try different angles. Lumix LX7 view.
A blast of evening sun illuminates an old CIE 20 foot container along the line. Canon EOS 7D with 200mm lens.
An uproad ICR at milepost 17. Canon EOS 7D with 200mm lens.
An uproad ICR catches a wink of evening sun.  Canon EOS 7D with 200mm lens.
An uproad ICR catches a wink of evening sun. Canon EOS 7D with 200mm lens.

Finally, at 9:18pm I got word that The Marble City with 461 had reached Cherryville Junction and was making its dash for Dublin—some four hours behind schedule.

The light was fading fast when I made this view of an uproad Irish Rail ICR at milepost 17. What could expect of the steam special?

It passed us just before 10pm, which made for a rare summer evening view of an Irish steam special. Most RPSI trips run in daylight! Using film I’d have been out of luck, but thanks to advances in digital photograph I was able to make a distinctive image.

Exposed at 9:51pm on July 27, 2014 with a Canon EOS 7D with f2.0 100mm lens, set at ISO 3200 1/80th of a second at f2.0. White balance set for ‘daylight.’ To keep the locomotive sharp, I panned slightly. I processed the camera RAW file in Photoshop to lighten the image slightly and improve contrast.

Tracking the Light posts new material every morning.

Please share Tracking the Light!

http://briansolomon.com/trackingthelight/


Maine Central Tracks in the Snow.

Lincoln, Maine 1996.


Exposed on Fujichrome 100 with an F3T fitted with Nikon 80-200mm lens.

In the heat of summer sometimes it’s nice to remember how things are in the winter.

Looking compass south on the Maine Central at Lincoln, Maine in the Winter of 1996.

The trick is exposing so there’s some texture in the snow without making the image so dark that the snow appears battleship gray and the shadows become opaque. Controlling flare helps.

Tracking the Light posts new material every morning.

Please share Tracking the Light!

http://briansolomon.com/trackingthelight/


Massachusetts Central, July 10, 2014—Retro Views

Black & White in the Modern Age.

Here are a few views I made with my Rolleiflex Model T of Mass-Central’s former Boston & Albany branch on July 10, 2014.

Why black & white? Why film? Why in 2014?

Mass-Central GP38 1751 crosses the Route 32 bridge in Ware, Massachusetts on July 10, 2014. Exposed on Tri-X using a Rolleiflex Model T with Zeiss Tessar lens.
Former Boston & Albany freight house at Gilbertville, Massachusetts along the Mass-Central's Ware River Branch on July 10, 2014.
Former Boston & Albany freight house at Gilbertville, Massachusetts along the Mass-Central’s Ware River Branch on July 10, 2014. Exposed on Tri-X using a Rolleiflex Model T with Zeiss Tessar lens.
Exposed on Tri-X using a Rolleiflex Model T with Zeiss Tessar lens. The film was processed in Kodak HC110, dilution B (1 part developer to 32 parts water) at 70 degrees F, for 6 minutes using three agitation inversions every 30-60 seconds.
Mass-Central 1751 works north of Gilbertville on July 10, 2014. Exposed on Tri-X using a Rolleiflex Model T with Zeiss Tessar lens.

There’s no question, digital photography is easier. If I desire a square black & white image, all I have to do is set my Lumix LX7 to a 1:1 aspect ratio using a switch on the camera, and set the ‘photo style’ to ‘monochrome’ using the function button.

This set up procedure takes just a few seconds, and I can switch back to color quickly and easily whenever I choose.

Working with the Rolleiflex is more cumbersome; the camera is klutzy to load, it only makes 12 frames per roll of film, and the film takes about an hour to process in the darkroom (dry to dry). Then I need to cut and sleeve the negatives and then scan them for presentation here.

Yet, I still do this. Not for every photograph, not on every outing, but I still go through the motions of using black & white film.

Why? I have five reasons:

1)    I like it.

2)    It gives me a subtle ‘retro’ quality that I can’t really get from digital.

3)    It allows me visual continuity: I’ve been making black & white railroad photos since the 1970s. Why stop now?

4)    I can still do it: I have the cameras, the film, the darkroom and the skills to get great results.

5)    The B&W film medium is known to be archival. I process my film using a two bath fixer, permawash and rinse for 15 minutes in clean running water. They are stored in archival sleeves. Barring the unforeseen, the negatives I processed should still be in good condition for viewing in 50 to 100 years, maybe longer. They will need no extra attention regarding ‘back up’, except to store them in a safe dry place.

This last point is not true with digital photos.  I make three backup copies of every digital image and store them in separate locations, but digital remains an ephemeral media. Hard drives, DVDs and all other existing means of commercially-available digital storage will, in time, go bad. Hard drives can fail, suddenly, completely and without warning. The information will be lost. The photos will vanish. Like the tide coming in on a child’s sandcastle, the images in their digital form will be washed away, forever.

Mass-Central at South Barre, Massachusetts. Exposed on Tri-X using a Rolleiflex Model T with Zeiss Tessar lens.
A cropped section of the above photo, enlarged to show detail. One of the flaws with WordPress web media is that images are automatically compressed which lowers the quality for ease of display.

Tracking the Light posts new material every morning.

Please share Tracking the Light!

http://briansolomon.com/trackingthelight/

Tomorrow: Colorful consist on a bridge!


Tracking the Light Daily Post: SEPTA at Overbrook, Pennsylvania—Part 2

Another day another Angle.

On evening July 2, 2014, my brother Sean and I returned to Overbrook. I wanted to get there a bit earlier to focus on SEPTA’s electric locomotive-hauled rush hour services, including the named ‘Great Valley Flyer.’ Also, I wished to feature the signaling more closely. Those vintage Pennsylvania Railroad position lights won’t be around forever.

The lighting was more diffused than the previous day, but this offered different opportunities.

SEPTA Silverliners meet at Overbrook on July 2, 2014. Lumix LX7 photo.
SEPTA Silverliners meet at Overbrook on July 2, 2014.  Here we have a classic view that features the trains, the railway station and ornate passenger shelters, plus SEPTA’s connecting bus. If every town could only be as fortunate as Overbrook! Lumix LX7 photo.
SEPTA's Great Valley Flyer crosses over at Overbrook. Pat Yough had warned me of this in advance, so I was prepared. Exposed with a Canon EOS 7D with 200mm lens.
SEPTA’s Great Valley Flyer crosses over at Overbrook. Pat Yough had warned me of this in advance, so I was prepared. Exposed with a Canon EOS 7D with 200mm lens.
Only a handful of SEPTA's suburban trains run with electric locomotives; most are EMUs. Canon EOS 7D photo.
Only a handful of SEPTA’s suburban trains run with electric locomotives; most are EMUs. Canon EOS 7D photo.
SEPTA's Great Valley Flyer, one of the system's few named trains. What other modern commuter operators have named suburban services? I wanted to feature the train passing the tower.
SEPTA’s Great Valley Flyer, one of the system’s few named trains. What other modern commuter operators have named suburban services? I wanted to feature the train passing the tower.
SEPTA's Great Valley Flyer doesn't serve Overbrook. Lumix LX7.
SEPTA’s Great Valley Flyer doesn’t serve Overbrook. Lumix LX7.

Often it helps to revisit locations several days in a row. Becoming more familiar with a place, helps to find different ways to photograph it.

Yet, with familiarity comes the risk of complacency. When a subject becomes so familiar that you stop seeing it in new ways, have you lost the edge? Is finding a new place the best time to make a photo, or at least perceive an opportunity?

Overbrook is hardly a new place for me, yet it is also one I’ve yet to master.

Rule 290, Restricting, displayed in classic Pennsylvania Railroad fashion using a reverse diagonal row of lights on the second head.
An inbound train approaches Overbrook. I was happy to catch a train with a restricting aspect displayed on the opposite signal. Canon EOS 7D photo.
Minutes later an express train zips through Overbrook on track 2. Notice the signal on the far side of the tracks has cleared to 'Approach'. Canon EOS 7D photo.
Minutes later an express train zips through Overbrook on track 2. Notice the signal on the far side of the tracks has cleared to ‘Approach’. Canon EOS 7D photo.
One last view. This outbound express tends to run with a locomotive hauled consist. I positioned myself to feature the locomotive and the tower. Lumix LX7 photo.

Tracking the Light posts new material every morning.

Please share Tracking the Light!

http://briansolomon.com/trackingthelight/


Tracking the Light Daily Post: On The Main Line at Overbrook, Pennsylvania—Part 1

Visual Quandaries in a Fascinating Place—July 1, 2014

Overbrook retains much of its Pennsylvania Railroad Main Line heritage. Not only is it a surviving portion of four track line, but it retains an active tower, traditional PRR position light signaling, plus its old station buildings and historic signage.

SEPTA at Overbrook.
Outbound SEPTA Silverliner V approaches Overbrook on a sunny evening, July 1, 2014. All the elements are here, but what is the best way to put them together in a dynamic image? Can one photo really do Overbrook justice? Canon EOS 7D photo with 100mm lens.

It remains a busy place with a regular interval SEPTA suburban service and Amtrak Keystone trains.

Curiously, it features track-work dating to an earlier era of railroad engineering. It is located on a sweeping curve with a full set of crossovers set in and around the station and low-level platforms.

Without getting into a detailed discussion on modern railroad engineering, let me just say, that there’s no way an interlocking and station would be situated like this today.

The interlocking at Overbrook is a vestige of steam-era railroad engineering. Today railroads wouldn't consider placing crossovers on curve in the middle of a busy station with low level platforms. Note the signal displaying 'Restricting' with a classic PRR aspect. Canon EOS 7D with 200mm lens. July 1, 2014.
Looking west on the Main Line: The interlocking at Overbrook is a vestige of steam-era railroad engineering. Today railroads wouldn’t consider placing crossovers on curve in the middle of a busy station with low level platforms. Note the signal displaying ‘Restricting’ with a classic PRR aspect. Canon EOS 7D with 200mm lens. July 1, 2014.

Yet, for all this historic railroad interest, Overbrook is a challenging place to make photographs. The curvature which adds so much character to the place, also makes it difficult to find a satisfactory photographic angle. While there is lots of antique infrastructure, it’s hard to find way to include it in balanced compositions.

Further difficulties are caused by nearby trees and a large overhead arched bridge that cast shadows on the line.

On successive evenings, July 1st and July 2nd, 2014, my brother Sean and I visited Overbrook to watch the evening parade of trains. Working with my Lumix LX-7 and Canon EOS 7D, I exposed images from a variety of angles. I was particular interested in featuring the old Pennsylvania signaling.

A vintage PRR position light signal (designed by A.H. Rudd) displays 'Approach Medium'. This signal is controlled by Overbrook tower, one of several classic interlocking towers on the Main Line in suburban Philadelphia. Canon EOS 7D with 200mm lens.
A vintage PRR position light signal (designed by A.H. Rudd) displays ‘Approach Medium’. This signal is controlled by Overbrook tower, one of several classic interlocking towers on the Main Line in suburban Philadelphia. Canon EOS 7D with 200mm lens.
Outbound SEPTA local at Overbrook catches the evening sun on July 1, 2014. Canon EOS 7D with 200mm lens.
Why make one photo when you can snap away! Which do you like better? The closer image or the distant one.
Why make one photo when you can snap away! Which do you like better? The closer image or the distant one?
SEPTA logo catches the evening glint at Overbrook on July 1, 2014. Canon EOS 7D with 200mm lens.
Sean Solomon checks the SEPTA app on his iPhone.
An inbound SEPTA local pauses at Overbrook station. The shinny silver train makes for a dynamic subject, but does this convey the spirit of Overbrook? Lumix LX-7 photo on July 1, 2014.
An inbound SEPTA local pauses at Overbrook station. The shiny silver train makes for a dynamic subject, but does this convey the spirit of Overbrook? Lumix LX-7 photo on July 1, 2014.
An eastward Amtrak Keystone passes Overbrook Tower. The signal displays Approach Medium. Canon EOS 7D photo.
Cab car trailing. Remember the Metroliner? Long gone, but the cab cars survive—for now.
An outbound Silverliner IV accelerates away from Overbrook after 8pm on July 1, 2014. Lumix LX7 photo.

Tomorrow, Happy Birthday to Tracking the Light!

Overbrook Part II to follow.

Tracking the Light posts new material every morning.

Please share Tracking the Light!

http://briansolomon.com/trackingthelight/


Amtrak Keystone Catches the Sun at Wayne.

The Last Twinkle of Glint.

On June 30, 2014, Pat Yough and I arrived at SEPTA’s Wayne Station minutes before sunset. We’d already spent a productive afternoon and evening catching the evening rush-hour on the former Pennsylvania Railroad Main Line.

I was interested by the ‘around the corner’ light effect west of Wayne. The nearest eastward SEPTA train was half an hour away. Thankfully, this Amtrak Keystone arrived before the sunset.

Exposed with a Canon EOS 7D with 200mm lens set at ISO 400, f9 at 1/500th of a second. White balance set to ‘daylight’ to avoid allowing the camera to balance for sunset conditions which would have minimized the reddish-orange effect of sunset.

For this image, I’ve cropped the leading former Metroliner cab car, and focused on the trailing AEM-7 and Amfleet coaches. The AEM-7s are running on borrowed time and I was happy to make this simple graphic image of one of the old electrics.

Calculating exposure wasn’t easy. My initial guess for exposure was about a stop too bright. I manually dialed the f-stop downward as the train entered the frame and the glinting sun reflected back towards me.

I’ve made many images like this on slide film. Kodachrome was a particular good means of capturing the glint effect. Its combination of a black & white film base (using a traditional silver halide grain structure) plus a wide exposure latitude tended to produce excellent results.

This day, Pat exposed a slide on Fujichrome, but I was limited to using my digital cameras.

Tracking the Light posts new material every morning.

Please share Tracking the Light!

http://briansolomon.com/trackingthelight/


Times Square Shuttle

One of the World’s Shortest Subway Routes.

Lumix LX-7 photo at Grand Central of the New York City Transit Authority's Times Square Shuttle.
Lumix LX-7 photo at Grand Central of the New York City Transit Authority’s Times Square Shuttle.

I was making my way from Grand Central toward Penn-Station and took a few minutes to photograph New York City’s famous Times Square Shuttle using a Lumix LX-7.

Although I’ve been making subterranean photos since the 1970s, I find that the digital photographic medium makes the process much easier, and my results generally are better.

In the 1990s, I made many New York City subway photos using a Nikon F3T with Ektachrome 200 and various filter combinations to compensate for artificial light conditions.

Calculating exposure was difficult, and despite the filtration my color balance was never 100 percent.

For these images, I set the camera for 400 ISO, selected the ‘A’-mode (Aperture priority) and set the aperture to f2.0, dialed in +1/3 exposure compensation (my standard override for interior photos), and allowed the camera’s auto-white balance take care of the artificial light.

Times Square, New York.

NYCTA_GCT_Times_Sq_Shuttle_P1050466

New York subway's tiled signs are a vestige of another era. After leaving the Times Square Shuttle I made my way to a change of trains to bring me south to 34th Street.
New York subway’s tiled signs are a vestige of another era. After leaving the Times Square Shuttle I made my way to a change of trains to bring me south to 34th Street.

Tracking the Light posts new material every morning.

Please share Tracking the Light!

http://briansolomon.com/trackingthelight/


Powell and Mason Car on Columbus Avenue.

San Francisco May 1994.

Cable Car on Columbus, exposed on Kodachrome in 1994.

This isn’t your typical cable car image. Where photographers, myself included, have often focused on San Francisco’s exceptionally steep hills, where cars appear to cling precariously to tracks, instead I’ve tried to make the most of one of more level sections of the cable car system.

I exposed this on Kodachrome 25 this using my old Nikormat FT3 with a secondhand Tokina 400mm lens.

This exceptionally long telephoto was very sharp but had very shallow depth of field. I used this quality to set background highway traffic, include some MUNI Trolley buses, out of focus, thus helping the viewer concentrate on the main subject—the famous cable car.

Although a simple image, there’s a lot to see in it. Despite my use of selective focus, the path of the cable car track (with its trademark central conduit) leads the eye beyond the car and around the corner toward Powell Street.

Aiding my effort was the rich afternoon sun for which San Francisco is often blessed. There’s an exceptionally pleasant quality to Bay Area sunshine that is best experienced in person, but has made for a great many photographic opportunities. I miss that quality of light when I’m not there!

Tracking the Light posts new material every morning.

Please share Tracking the Light!

http://briansolomon.com/trackingthelight/


Tracking the Light Daily Post: German Tram-Train at Dusk

Karlsruhe, Germany, May 2011.

Dawn and dusk are great times to make urban images where there’s a mix of natural and artificial light.

The reduced amount of daylight and the change in color temperature helps control contrast, simplifies exposure, while making for a more dramatic image.

I exposed this view of a tram train under the shed at Karlsruhe on the evening of May 11, 2011 using my Lumix LX-3.

The Germany tram train system allows specially designed light rail cars to share tracks with mainline trains. The system greatly benefits passengers and maximizes the use of the railway network.

Tracking the Light posts new material every morning.

Please share Tracking the Light!

http://briansolomon.com/trackingthelight/

Tomorrow: Dusk and an annoying cone!


Being There; Don’t Hate Me for My Luck!

Palmer, Massachusetts, June 22, 2014.

A wise photographer once wrote, ‘The secret to making photographs is f8 and be there.’

Back in the 1990s, my friend and fellow photographer Mike Gardner said, ‘All good trips begin and end in Palmer.’

Sunday, June 22, 2014 confirmed Mike’s wisdom. I’d headed to Palmer to meet my frient Tim Doherty. Before leaving the house, I searched in vain for my scanner, but departed without it. I was coasting on intuition.

Moments after stepping out of the car at CP83 in Palmer (where CSX crosses New England Central) to say ‘hello’ to Tim, I heard, above the dull roar of road traffic, the distinct sounds of eastbound train’s dynamic brakes.

I said to Tim, ‘There’s an eastbound train, and it’s very close.’ I flicked on the Lumix LX7 that was hanging around my neck and stepped promptly toward my preferred trackside location at CP83. As I did, I heard the lead axles of a six-motor GE rattling across the New England Central diamond a few hundred feet to my west.

I had just enough time to set the exposure and frame up a nice view of CSX Q012 passing CP83’s signals with the old Palmer Union Station (now the Steaming Tender Restaurant) to the left of the old Boston & Albany mainline.

Eastbound in the morning sun. CSX's Q012 has a clear signal at CP83 in Palmer, Massachusetts. Total elapsed time from my arrival in Palmer to the passage of this freight? Less than 2 minutes.
Eastbound in the morning sun. CSX’s Q012 has a clear signal at CP83 in Palmer, Massachusetts. Total elapsed time from my arrival in Palmer to the passage of this freight? Less than 2 minutes.
The Lumix L7 cycles relatively quickly, so I was able to make a second grab shot, just a few moments after the first.
The Lumix Lx-7 cycles relatively quickly, so I was able to make a second grab shot, just a few moments after the first.

There’s a 30 mph speed restriction on the diamond for freight. As the train rolled through, I said, ‘we can catch this again.’ And, off we went on the first of a long-day’s railway photography adventures.

Nearly 12 hours later, we returned to Palmer and, as it turned out, repeated the exercise in fortuity. Immediately upon our arrival, the signals lit at CP83 and these soon cleared to green on the main track. ‘We’ve got a westbound, and it can’t be far off.’

I knew this because CSX’s signals at CP83 are approach-lit, and only light when something has actuated the track circuits between CP83 and CP79 (located at the east-end of the controlled siding). Also, when a signal has been cleared, a train must close.

Again, we had just enough time to get in position for photography.

Walking toward the diamond, some diners leaving the Steaming Tender asked me, ‘Is a train coming?’

Not having time to waste more than a moment in conversation, I replied, ‘Yes, a westbound is very close. Less than four minutes away.’ A headlight appeared to the east as I made the comment.

“How did you know that?” The diners asked, as if I possessed some blind precognition. “The signal shows ‘clear’ for the main track,” was my honest reply, but I may as well answered in ancient Greek.

What's this? A westward piggyback train in the afternoon? On a Sunday? I'm not one to argue, but i was surprised to see it. Canon EOS 7D with 200mm lens.
What’s this? A westward piggyback train in the afternoon? On a Sunday? I’m not one to argue, but I was surprised to see it. Canon EOS 7D with 200mm lens.
Customers at the Steaming Tender wave to the passing freight. Lumix LX-7 photo.
A tight view of CSX Evolution-series diesels rolling toward the Palmer diamond. Lumix LX-7 photo.
A tight view of CSX Evolution-series diesels rolling toward the Palmer diamond on the evening of Sunday June 22, 2014. Lumix LX-7 photo.
Trailing view at the Palmer diamond in the glinty evening light. A CSX westward intermodal train makes for a graphic subject. Canon EOS 7D with 200mm lens.

My luck?—Being in the right place at the precisely the right times. However, I made my own luck. By keeping my ears open and my eyes on the signals, I knew to act quickly. Stop, look and listen, right? There’s no mystery there.

Tracking the Light posts new material every morning.

Please share Tracking the Light!

http://briansolomon.com/trackingthelight/


On the Main Line near Cresson, Pennsylvania.

June 30, 2010.

This is one of my favorite classic locations. The abutments for the old Route 53 overpass across the former Pennsylvania Railroad between Gallitzin and Cresson offered a great vista for westward train in the afternoon.

A westward Norfolk Southern freight approaches the Route 53 overpass near west of Gallitzin, Pennsylvania on June 30, 2010. I’ve heard that the highway overpass was recently replace/upgraded. Does anyone know how this affected this view point that was made from the old bridge abutments east of the bridge?
A westward Norfolk Southern freight approaches the Route 53 overpass near west of Gallitzin, Pennsylvania on June 30, 2010. I’ve heard that the highway overpass was recently replaced/upgraded. Does anyone know how this affected this viewpoint from the old bridge abutments where this photo was exposed?

I exposed this view four years ago today using my Lumix LX3. I’d set the camera’s aspect ratio to 16:9 which gives a slightly more panoramic view when held horizontal. One of the advantages of the Panasonic Lumix LX series cameras is the ability to adjust the aspect ratio.

I’ve found this a great compositional tool because it allows me to frame photographs differently with the touch of a switch. This is almost like having a whole new camera system without all the complications.

You might  ask, ‘why not just use the camera full-frame and then crop the image later?’ My answer is simple: When I compose an image, I’m taking into consideration the relative placement of all the elements and lighting. I find this is most effective when done on site, and not after the fact.

Tracking the Light posts new material every morning.

Please share Tracking the Light!

http://briansolomon.com/trackingthelight/


SEPTA at Sunset, Neshaminy Falls—Tracking the Light Daily Post.

February 27, 2012.

SEPTA’s stainless steel electric multiple units are well-suited for low-light glint photographs.

Pat Yough and I were exploring former Reading Company trackage north of Philadelphia and ended the day at Neshaminy Falls, Pennsylvania. Here SEPTA’s electrified route from center city to West Trenton, joins CSX’s freight route. I exposed this image using my Canon EOS 7D.

  Exposed with a Canon EOS 7D with 28-135 zoom lens set at 28mm; f5.6 at 1/500th of a second; 400 ISO. Natural light; in-camera JPG without any changes to color, contrast or exposure in post processing.

Exposed with a Canon EOS 7D with 28-135 zoom lens set at 28mm; f5.6 at 1/500th of a second; 400 ISO. Natural light; in-camera JPG without any changes to color, contrast or exposure in post processing.

Key to a successful ‘glint’ photo is pre-selecting the ideal exposure. From years of experience, I’ve learned that to make this type of photo work, it is necessary to set exposure for the highlights, while allowing the shadow areas to go slightly dark.

This requires a bit of balance, since over compensating for bright highlights will cause shadow regions to become opaque, while failure to account for the glint effect will result in an overexposed image that loses the rich low-light atmosphere.

This photo makes for an excellent example since I got that balance right on-site and without the need for any post process compensation: What you see here is my in-camera JPG without manipulation (except for scale adjustment for web presentation). The original RAW file has more detail.

Also, since photo includes the sun, it provides a lesson in the necessary angle to produce the ‘glint’ effect. An alternative method is to crop the sun from the photo, either by blocking it with some natural source in the photo (tree, building, cliffside), or by using a shading device to prevent its rays from directly touching the front lens element (I often use my handheld note book).

Tracking the Light posts new material every morning.

Please share Tracking the Light!

http://briansolomon.com/trackingthelight/


Summer Solstice with the Vermonter

Train 54 at Millers Falls.

June 21st was the longest day of the year. Amtrak’s Vermonter (Train 54) departed Amherst, Massachusetts at 4:32 pm, twelve minutes after the advertised.

Sometimes late trains are a benefit. I was aiming toward Millers Falls, hoping to make a photo on the famous high bridge over the Millers River. I arrived nine minutes before the train crossed this span. If the train had been on schedule, I’d have missed it.

Since 1986, I’ve photographed this bridge on many occasions. It was nearly 25 years ago that my dad and I made images of Amtrak’s re-inaugural Montrealer.

Since then, Amtrak service has worked the old Central Vermont north of Palmer to East Northfield (however, where the Montrealer joined the CV route at New London, since 1995, Montrealer’s successor, the daytime Vermonter, works the New Haven-Springfield line, then over the Boston & Albany route to Palmer).

Not for much longer though. The parallel former Boston & Maine Connecticut River Line between Springfield and East Northfield is being upgraded and will soon be again hosting Amtrak. So, as mentioned in previous posts, I’ve been making opportunities to photograph the Vermonter on the Palmer-East Northfield New England Central line-segment while I still can.

Amtrak train 54 crosses the Millers Falls high bridge on June 21, 2014. This location presents several photographic challenges. The first is a deceptive angle. I made this view from the Route 63 bridge immediately to the west. While the two bridges are adjacent, they are not parallel, and the slight skewed crossing of the railroad bridge makes it difficult to make a level image. What appears level to the eye, isn't really level. Rather than gauge the bridge, it helps to watch the level of the Millers River. Of course, if you miss the level, you can always 'fix it in photoshop.'
Amtrak train 54 crosses the Millers Falls high bridge on June 21, 2014. This location presents several photographic challenges. The first is a deceptive angle. I made this view from the Route 63 bridge immediately to the west. While the two bridges are adjacent, they are not parallel, and the slight skewed crossing of the railroad bridge makes it difficult to make a level image. What appears level to the eye, isn’t really level. Rather than gauge the bridge, it helps to watch the level of the Millers River. Of course, if you miss the level, you can always ‘fix it in photoshop.’
A second difficulty is calculating exposure. Photographing a highly reflective train against a background of dark green trees can fool camera meters. This is acerbated when the sun relatively low on the horizon, since the light tends reflect back toward the camera. Experience with the location helps; anticipating the bright train, I pre-adjusted my exposure by two-thirds of a stop to compensate for the sudden brightness on the bridge. Vermonter's trailing cab car glints in the afternoon sun.
A second difficulty is calculating exposure. Photographing a highly reflective train against a background of dark green trees can fool camera meters. This is acerbated when the sun relatively low on the horizon, since the light tends reflect back toward the camera. Experience with the location helps; anticipating the bright train, I pre-adjusted my exposure by two-thirds of a stop to compensate for the sudden brightness on the bridge. Vermonter’s trailing cab car glints in the afternoon sun.


Tracking the Light posts new material every morning.

Please share Tracking the Light!

http://briansolomon.com/trackingthelight/


Brian Solomon’s The Twilight of Steam, Behind the Scenes

John E. Pickett, Steam Hunter.

John_Pickett_with_his_Graflex_P1520078
John Pickett with his Graflex in July 2013. Photo by Brian Solomon

John E. Pickett is among the great photographers I featured in my book The Twilight of Steam. A life long friend of Jim Shaughnessy (also featured), John has had the opportunity to photograph steam locomotives all across North America.

In the 1940s, he was fortunate to grow up in Canajoharie, New York, located just across the Mohawk River from New York Central’s four-track mainline at Palentine Bridge. His early experiences watching the parade of Hudsons, Mohawks, and Niagaras working the Water Level Route inspired him to make wonderful photographs of locomotives at work before diesels took over.

John's early New York Central photos were exposed with 616 Kodak Monitor but he later bought a National Graflex that had a relatively fast Bausch & Lomb f3.5 lens and 1/500th of a second top shutter speed, and then a Series B Graflex with a top shutter speed of 1/1000th.
John’s early New York Central photos were exposed with 616 Kodak Monitor but he later bought a National Graflex that had a relatively fast Bausch & Lomb f3.5 lens and 1/500th of a second top shutter speed, and then a Series B Graflex with a top shutter speed of 1/1000th.

The Twilight of Steam features dozens of John’s images and tells of his experiences and techniques.

The Twilight of Steam was published by Voyageur Press and will be available from June 15, 2014.

I’ll be revealing more about the book over the next few days! Stay tuned.

Tracking the Light posts new material every morning.

Please share Tracking the Light!

http://briansolomon.com/trackingthelight/

Union Pacific Coal Train—Ten Years to the Day.

Silhouette at Sunset.

West of Rochelle, Illinois, June 15, 2004: the sky was aflame with the evening glow. As the setting sun illuminated prairie-dust and low cloud that had blown in from the west.

I was parked near the Global III intermodal yard south of Union Pacific’s former Chicago & North Western mainline. This is a busy stretch of railroad.

A Union Pacific coal train works east near Rochelle, Illinois. Exposed with a Nikon F3 on Fujichrome slide film. Notice the ditch-lights; I’ve given just enough of an angle so there’s the faint twinkle at the front of the locomotive.

Central Illinois is flat open country which is prefect for making sunset silhouettes: using the big sky as back drop for a train.

Here I’ve taken nearly a broadside position, exposed for the sky while keeping the train in the lower quarter of the frame.

When I worked at Pacific RailNews in the mid-1990s, we favored silhouetted views with lots of sky to use for opening spreads. It was the style to lay headlines and text in the sky.

I’ve always like the simplicity of silhouettes; raw and dramatic with details largely left to the imagination.Tracking the Light posts new material every morning.

Please share Tracking the Light with everyone who may enjoy it!

http://briansolomon.com/trackingthelight/


Enhanced by Zemanta

Southern 6900 at Spencer, North Carolina, May 30, 2014—Tracking the Light Special Post.

A Classic E8A at Speed.

Using the LX-7, I made a pan of Southern E8A 6900 working an excursion at North Carolina Transportation Museum’s Streamliners at Spencer event.

This beautifully restored locomotive is a vision from an earlier era. Passenger trains just don’t look like this anymore.

Exposed on May 30, 2014 using a Panasonic Lumix LX-7. Exposure f8 at 1/40th of a second. Except for scaling for internet presentation, this file is unmodified. There were no corrections to exposure, color or contrast.

I made a spot decision to pan in order to visually separate the green on the locomotive from the densely foliated background.

Since I had only a few seconds to adjust my exposure, I left the camera in ‘A’ mode (aperture priority), added +1/3 of a stop (to lighten the scene), and turned the external aperture ring to f8, the smallest setting. This forced the camera to select a slower shutter speed, which is what I needed for a successful pan.

I moved the camera with the front of the locomotive as it passed.

One other trick: this engine was trailing, not leading.

For more Steamliners at Spencer photos click HERE.

Tracking the Light posts new material every morning.

Please share Tracking the Light!

http://briansolomon.com/trackingthelight/


Enhanced by Zemanta

Lumix LX-7 Test at Palmer, Massachusetts.

May 24, 2014.

Last month (April 2104), my Panasonic Lumix LX-3 began performing erratically while I was photographing Irish Rail at Monasterevin.

Although annoying, this was only a minor setback of the day, because I had my Canon EOS 7D with me. I often travel with at least two cameras, just in case one develops problems.

The LX-3 suddenly suffered an electrical fault; specifically the rear display stopped working reliably. Sometimes it would flicker on, other times it was dark. I tried all the usual cures; I turned the camera off and then on, I removed the battery, I even tried the factory reset. No joy.

In the short term I found that if I pressed on the side of the camera body, the display would come on long enough to make adjustments. I continued to use the LX-3 for secondary services, while relying on the Canon EOS 7D and film cameras for more critical work.

I’ve had my LX-3 for almost five years and in that time I’ve carried it with me everywhere. It’s visited about a dozen countries, and more than a dozen US states. In addition to pictorial service, I’ve used it intensively to copy documents while in libraries. Using the in-camera file counter, I determined that I released the shutter more than 64,000 times.

Last November the camera took a very hard knock, which didn’t immediately affect its performance, but certainly didn’t do it any good. In April, the camera was subject to unusual dampness (it got wet) while I was making night shots in Porto, Portugal.

LX-7 view of Amtrak 54, the Vermonter, at Palmer on May 24, 2014. The camera was set to simultaneously expose Jpg and RAW. It does an excellent job retaining highlight detail.
LX-7 view of Amtrak 54, the Vermonter, at Palmer on May 24, 2014. The camera was set to simultaneously expose Jpg and RAW files. It does an excellent job retaining highlight detail.

On May 24, 2014, my father lent me his Panasonic LX-7 to see if this newer Lumix model would offer a suitable replacement. This camera comes highly recommended to me by several people. Since it’s essentially the latest model kin to my LX-3, it may represent an ideal choice for my new ‘everywhere camera’.

I brought it to Palmer, Massachusetts where I exposed about 100 images in various conditions, both to get a feel for the cameras controls (which have several notable differences from the LX-3), and examine the quality of the images.

LX-7 Manual focus controls are similar to those on the LX-3 but take a bit of getting used to.
Checking the Amtrak timetable. The LX-7 manual focus controls are similar to those on the LX-3 but take a bit of getting used to.
Among the advantages of digital photography are much improved photos exposed in overcast-lighting. Using the LX-7's manual over-ride, I intentionally over exposed by 1/3 stop to better expose for the ground and trees. I hadn't yet mastered the LX-7s various metering modes, and its possible there was a more effective means for adjust the exposure.
Among the advantages of digital photography are much improved photos exposed in overcast-lighting. Using the LX-7’s manual over-ride while in ‘A’—aperture priority, I intentionally over exposed by 1/3 stop to allow for better detail and contrast in ground-areas  and trees. I hadn’t yet mastered the LX-7’s various metering modes, and it’s possible there was a more effective means for adjust the exposure.
CSX Q423 (or L423) was working Palmer yard. In this view it pulls passed CP83 to double its train out of the yard. I exposed several telephoto views with the LX-7. By keeping the camera relatively low to the ground, I've minimized foreground distractions while allowing for a more dramatic perspective on the locomotives.
CSX Q423 (or L423) was working Palmer yard. In this view it pulls passed CP83 to double its train out of the yard. I exposed several telephoto views with the LX-7. By keeping the camera relatively low to the ground, I’ve minimized foreground distractions while allowing for a more dramatic perspective on the locomotives.

I found that the LX-7 had several positive points. In general it reacted quicker and cycled faster than the LX3. Its zoom lens has a wider range, and offers longer telephoto photo settings. The rear display seemed sharper and brighter.

On the downside, I was unfamiliar with the controls, so setting the camera proved challenging. Also, the camera is slightly larger.

In general I was happy with my results, and plan to experiment a bit more with the camera before I commit to buying one. There are a variety of excellent small cameras on the market these days, so I may wish to sample some of these too. More to come!

A modern GE Evolution-Series diesel faces a mid-1980s era SD50. The locomotives stopped, giving me ample time to make detailed views. LX-7 photo.
Low-angle on CSX 875 leading symbol freight Q423 (or L423) at Palmer. LX7 at its widest view.
Finally on its way west, this CSX freight crossing the Palmer diamond. Another CSX westbound was close behind. LX-7 view. All photos are un-modified except for scaling necessary for internet presentation.
Finally on its way west, this CSX freight crossing the Palmer diamond. Another CSX westbound was close behind. LX-7 view. All photos are un-modified except for scaling necessary for internet presentation. The LX-7 handles high contrast situations very well. I was in the ‘standard’ color setting.

Tracking the Light posts new material every morning.

Please share Tracking the Light with everyone who may enjoy it!

http://briansolomon.com/trackingthelight/


Enhanced by Zemanta

Los Angeles Blue Line at Long Beach

Pan Photography: Why and How.

Exposed with a Canon EOS 3 on Fujichrome slide film.
June 2008. Exposed with a Canon EOS 3 on Fujichrome slide film.

I made this pan of a Blue Line light railcar on the streets of Long Beach, California while researching my book Railroads of California.

Panning is one of my preferred techniques for making a dynamic image while separating the subject from the background.

This can be especially useful on dull days where a lack of contrast makes for bland scenes, or in complex urban environments where the subject maybe lost in a tapestry of intersecting lines.

It’s also a great way to compensate for harsh lighting.

Some tricks for making successful pan photos: select a slow shutter speed (1/15 -1/60th of a second), aim for a broadside angle, and follow your subject while releasing the shutter as you move. Use smooth lateral motion. Do not stop panning once you release the shutter. Practice repeatedly.

Tracking the Light posts new material every morning.

Please share Tracking the Light with everyone who may enjoy it!

http://briansolomon.com/trackingthelight/

Tomorrow: An Iowa Interlude.


Enhanced by Zemanta

Daily Post—LUAS on Abbey Street.

Making use of April Evening Light.

Years ago, I noticed that in mid-April the evening sun floods Abbey Street in Dublin with low warm bright light. This only lasts for a few weeks. During the winter, the street is largely shadowed and in summer the evening sun swings too far to the north.

The other day, I walked along the LUAS Red Line on my way into the City Centre. Where Abbey Street crosses Capel Street there’s a bit of jog in the tracks which allows for an interesting perspective with a telephoto lens.

Looking east on Abbey Street in Dublin, April 25, 2014.
Inbound and outbound LUAS trams pass near the Jervis Stop.
The 100mm lens allows for moderate compression of the scene and makes use of the jog in the tracks.
The 100mm lens allows for moderate compression of the scene and makes use of the jog in the tracks. A 400mm lens will look much farther down the street and bring in a hint of Irish Rail’s Loop Line Bridge.
One last image before the LUAS tram whizzes by me.

In past years, I’ve worked this spot with some really long lenses. However on this occasion I took a more conservative approach, choosing my Canon 100mm.

It was a Friday evening so there were lots of people on the street and outbound trams were full with passengers heading home.

Tracking the Light posts new material every morning.

Please share Tracking the Light with everyone who may enjoy it!

http://briansolomon.com/trackingthelight/

Tomorrow: PCC Car in Morning Light.


Enhanced by Zemanta

On Location in Portugal.

Surveying Places for Photography on the CP Mainline near Vale de Figuera.

An express passenger train glides upgrade near Vale de Figueira, Portugal. Exposed with a Canon EOS 7D with 20mm lens. This location didn't jump out at me on the map, but it still warranted inspection. It turned out to be much better than I hoped for trains in the southward direction.
An express passenger train glides upgrade near Vale de Figueira, Portugal. Exposed with a Canon EOS 7D with 20mm lens. This location didn’t jump out at me on the map, but it still warranted inspection. It turned out to be much better than I hoped for trains in the southward direction.

Using Google Maps, I’d pre-selected a variety of locations on Comboios de Portugal’s main line between Entroncamento and Santarem that I thought warranted investigation.

The great thing about modern tools is that they can save a great deal of time searching for photographic angles with minimum investment.

Back in the old days, I spent hours in libraries scouring USGS topographical maps and making photo copies of same in preparation for a trip.

Today, I simply go to Google Earth and make screen shots on my iPad of various maps and satellite views of prospective locations which I file for reference when navigating. Street view can offer additional perspectives.

I realize there are even more efficient ways to accomplish this, but I’m ‘old-school’ in my basic approach.

Finding a spot on a map is all well and good, but I still find it imperative to inspect locations in person and on the ground.

A place that looks good on a map or satellite view, may prove be unworkable for a variety of reasons; line-side brush, fences and other obstructions may interfere with photography, elevation may be too high or too low. Access may be restricted or difficult to obtain. Lines with overhead electrification can prove especially difficult.

Sometimes, a location that seemed uninspiring on a map proves to be just the right spot.

Case in point: these photos were made from an overhead bridge north of Vale de Figueira on a short steeply grade section of mainline.

What I liked about the location was the curves in the track, the texture of plants in the cutting, and the distinctively scenic backdrop. On the downside, this place would have been better a couple hours earlier in the day, as the light was harsher than I’d like.

The S-curve allowed for a dynamic perspective for northward trains, but by early afternoon the lighting was pretty harsh. This may have been a better spot for northward trains much earlier in the day. I photographed this double-headed electric coal train downgrade using my Canon EOS 7D with 20mm lens. By cropping the sky, I minimized the difficult contrast.

Tracking the Light posts new material every morning.

Please share Tracking the Light with everyone who may enjoy it!

http://briansolomon.com/trackingthelight/

Tomorrow: Urban view with a telephoto lens!


Enhanced by Zemanta

Freight among the Bricks—Haverhill, Massachusetts.

Guilford—May 1997.

It was a clear fresh May morning when I met my friend George S. Pitarys for a day’s photography. We were aiming to photograph the New Hampshire North Coast’s rock train, however, George said to me, ‘lad, we have a diversion.’

We set up at Boston & Maine’s heavy truss over the Merrimack River at Haverhill for a westward freight. The attraction was a trio of former Santa Fe SD26s in the lead.

A Guilford freight works west (compass south) at Haverhill, Massachusetts, the sounds of its EMD 645 engines permeating the morning air.

As the train approached the bridge, I was impressed by the view of the old brick buildings with the train looming to the left.

I exposed this image with my Nikon N90S with 80-200mm lens. I also made a more traditional view of the locomotives on the bridge, but for me, this one better conveys railroading in a post-industrial New England scene.

Tracking the Light posts new material every morning.

Please share Tracking the Light!

http://briansolomon.com/trackingthelight/


Enhanced by Zemanta

Railcar Sunset.

Irish Rail, Heuston Station, Dublin.

A railcar sunset? No, it’s not a metaphor, it really was a railcar at that time of day.

On April 15, 2014, I was passing the Heuston shed and notice that the soft orange light of the setting sun had illuminated this cavernous space. Lucky for me, there was a train approaching platform 4. (If it had been lined to any of the other platforms this photograph wouldn’t have worked.)

Using my Lumix LX3, I made this panned view. It captures the motion while helping to visually separate the front of the train from the interior ironwork. The low light allows for a pleasing glint effect without becoming overbearing or distracting.

ICR_arriving_Heuston_mod1_P_2

Lumix LX3 photo; f2.2 1/50th ISO 80. Contrast and exposure adjusted in post processing.

Tracking the Light posts new material every morning.

Please share Tracking the Light!

http://briansolomon.com/trackingthelight/

Tomorrow: narrow alleys and narrow gauge.

Enhanced by Zemanta

International Train Hotel-Entroncamento, Portugal

April 3, 2014.

Entroncamento Station, Portugal on the evening of April 3, 2014.

Portugal shares the broad Iberian standard gauge with Spain: rails are five feet six inches apart. Despite this commonality, today there are relatively few international services between the two countries.

One of the few cross-border trains is the nightly combined Lusitania/Sud Expresso connecting Lisbon with Spanish cities. The Lusitania runs Lisbon-Madrid, while the Sud Expresso is a vestige of the old Wagon Lits luxury express that once connected Lisbon with Paris, but now only goes as far as Irun on the Spanish-French frontier.

The train operates with RENFE (Spanish Railways) TALGO train hotel equipment, which makes it anomalous compared with the majority of Portuguese passenger trains.

On April 3, 2014, I planned to photograph the eastward Lusitania/Sud Expresso (train 335/310) during its station stop at Entrocamento, Portugal.

This is a big station, adjacent to freight yards, shops, and Portugal’s National Railway Museum.

Portugal.
Entrocamento Station with the nightly Lisbon-Spain train hotel approaching in the distance. Exposed with a Lumix LX3 set at 80 ISO.

The train departed Lisbon Santa Apolónia at 9:18 pm, and arrived at Entroncamento a little more than an hour later. I had less than five minutes to make photographs.

I worked with three cameras. First exposing digital time exposures using my Lumix LX3 positioned on a mini Gitzo tripod. I made several images using my standard night photo technique (see: Lumix LX-3—part 2:  Existing Light Digital Night Shots).

Entrocamento Station with the nightly Lusitania/Sud Expresso paused for its station stop. Exposed with a Lumix LX3 set at 80 ISO. I used the self timer set at 2 seconds to minimize vibration.

Then I quickly swapped the Lumix for my Canon EOS 3 with 40mm lens loaded with Provia 100F, and made a three exposure bracket. With film, I find it difficult to gauge night exposures, so I aided my efforts with my handheld Minolta Mark IV light meter.

Provia 100F has a filtration layer that minimizes undesirable color spikes caused by fluorescent and sodium lighting.

In the middle of this time-exposure exercise, I also made several handheld images using my Canon EOS 7D set for a high ISO. I figured that covered most of the angles.

I exposed this view of the Lusitania/Sud Expresso using my Canon EOS 7D handheld with a 20mm lens; ISO 4000 f2.8 1/50th of a second. While not as critically sharp as the tripod mounted Lumix image, it has a nice feel to it. Also, for me it’s a fast and easy ‘safety’ shot, in case my more elaborate technique using the Lumix failed to work as hoped.

I was distracted during my efforts by the arrival of a Takargo Vossloh E4000 diesel (powered by an EMD 16-710 engine) hauling a container train.

As soon as the train hotel pulled away, I repositioned to photograph the diesel-hauled container train.

Takargo Vossloh E4000 diesel rumbles in the sodium vapor gloom of Entrocamento. Lumix LX3 photo.

Tracking the Light posts new material every morning.

Please share Tracking the Light!

http://briansolomon.com/trackingthelight/

Enhanced by Zemanta

Tilting Train: Portugal’s Alfa Pendular Service.

Photographing a tilting train at speed in curves.

My first experience with the Italian Pendolino design was in Switzerland more than 14 years ago when I was researching for my book Bullet Trains—a survey of high-speed trains and railways (published by MBI in 2001).

Here’s an excerpt from my text:

The Pendolino’s tilt system provides a luxurious, smooth ride, on sinuous track. The effect of the tilting is subtle and scarcely noticeable as the train glides a long at speed. The Pendolino has proven a successful export item, and have been ordered by Finnish, Czech, and British railways. The appeal of the Pendolino, and other successful tilting designs, such as the Spanish TALGO and Swedish X2000  is the ability to increase running speeds without a massive investment in new infrastructure.

Since that time, several additional European countries have added Pendolino trains to their fleets. I’ve photographed them in a half dozen countries, most recently in early April this year, in Portugal where they are assigned to premier services between Porto, Lisbon and Faro.

A gate keeper signals a passing Pendolino as it races through the country station at Mato de Miranda, Portugal on April 3, 2014. Exposed with a Canon EOS 7D with 100mm lens.
Trailing view of a CP Pendolino passing Mato de Miranda, Portugal on April 3, 2014. Canon EOS 7D with 20mm lens.


Comboios de Portugal (Portugal’s national railway, known by initials ‘CP’) has ten train-sets which work as Alfa Pendular services.

A challenge when photographing Pendolino trains is catching them mid-tilt. I’ve found one  way to capture this is working from the outside of a curve using a long telephoto lens. This is most effective when the front of the train has tilted but the rear remains level with the track structure.

It helps to level the camera with an obvious line-side vertical object such as electrification masts, signals or buildings.

Another technique is to catch the train on the inside of a curve with a wider lens, but still leveling the camera with line-side vertical elements.

A CP Pendolino glides out of the fog near Coimbroes, Porto on the last lap of its run northward from Lisbon. Canon EOS 7D with 100mm lens.

Tracking the Light posts new material every morning.

Please share Tracking the Light!

http://briansolomon.com/trackingthelight/

Tomorrow: Night Photography, Iberian Style.

Enhanced by Zemanta

Trams in the Rain, March 21, 2014.

Making the most of a Gloomy Evening.

Who said a dull rainy evening isn’t a good time to make photos? I beg to challenge that!

On the evening of March 21, 2014, I was at the corner of Abbey and O’Connell Streets in Dublin just as the final hints of daylight were about to mopped up by heavy low clouds.

I exposed these photos with my handheld Lumix LX3 set at ISO 200. Dublin’s LUAS trams provided a handsome subject and the rain added a bit of gloss.

Abbey Street, Dublin. The Grand Central Bar on the right. Exposed at f2.8 1/15th second ISO 200.
A cyclist negotiates O'Connell Street. Pan photo exposed at f2.8 1/6th of a second at ISO 200.
A cyclist negotiates O’Connell Street. Pan photo exposed at f2.8 1/6th of a second at ISO 200.
Exposed at f2.8 1/8th of a second ISO 200.
Looking west on Abbey Street.
Waiting for the lights to change.
Crossing O'Connell Street.
Crossing O’Connell Street.

Click here to see my Dublin Page for more photos and check my Ebook: Dublin Unconquered custom designed for Apple iPad available from Apple iTunes.

Tracking the Light posts new material every morning.

Please share Tracking the Light!

http://briansolomon.com/trackingthelight/

Enhanced by Zemanta